Use your forms to setup recurring payments or subscriptions
Occasionally, taking a one time charge (documented in another article) is not enough for your scenario. You may want to setup recurring payments or subscriptions for your customers so they don't need to come back to the form periodically. Your customers can enter in their card information once and you will automatically charge them when necessary. You may also want to set a card up so you can create future charges on the card.
Recurring payments / subscriptions is a paid feature. If you are on the basic tier, you will be prompted to either try the feature or upgrade to any of our paid plan for $10/month.
In this simple tutorial, we will be walking you through the process of setting up a subscription question so that you can store your user's card information securely and charge 50 usd every month.
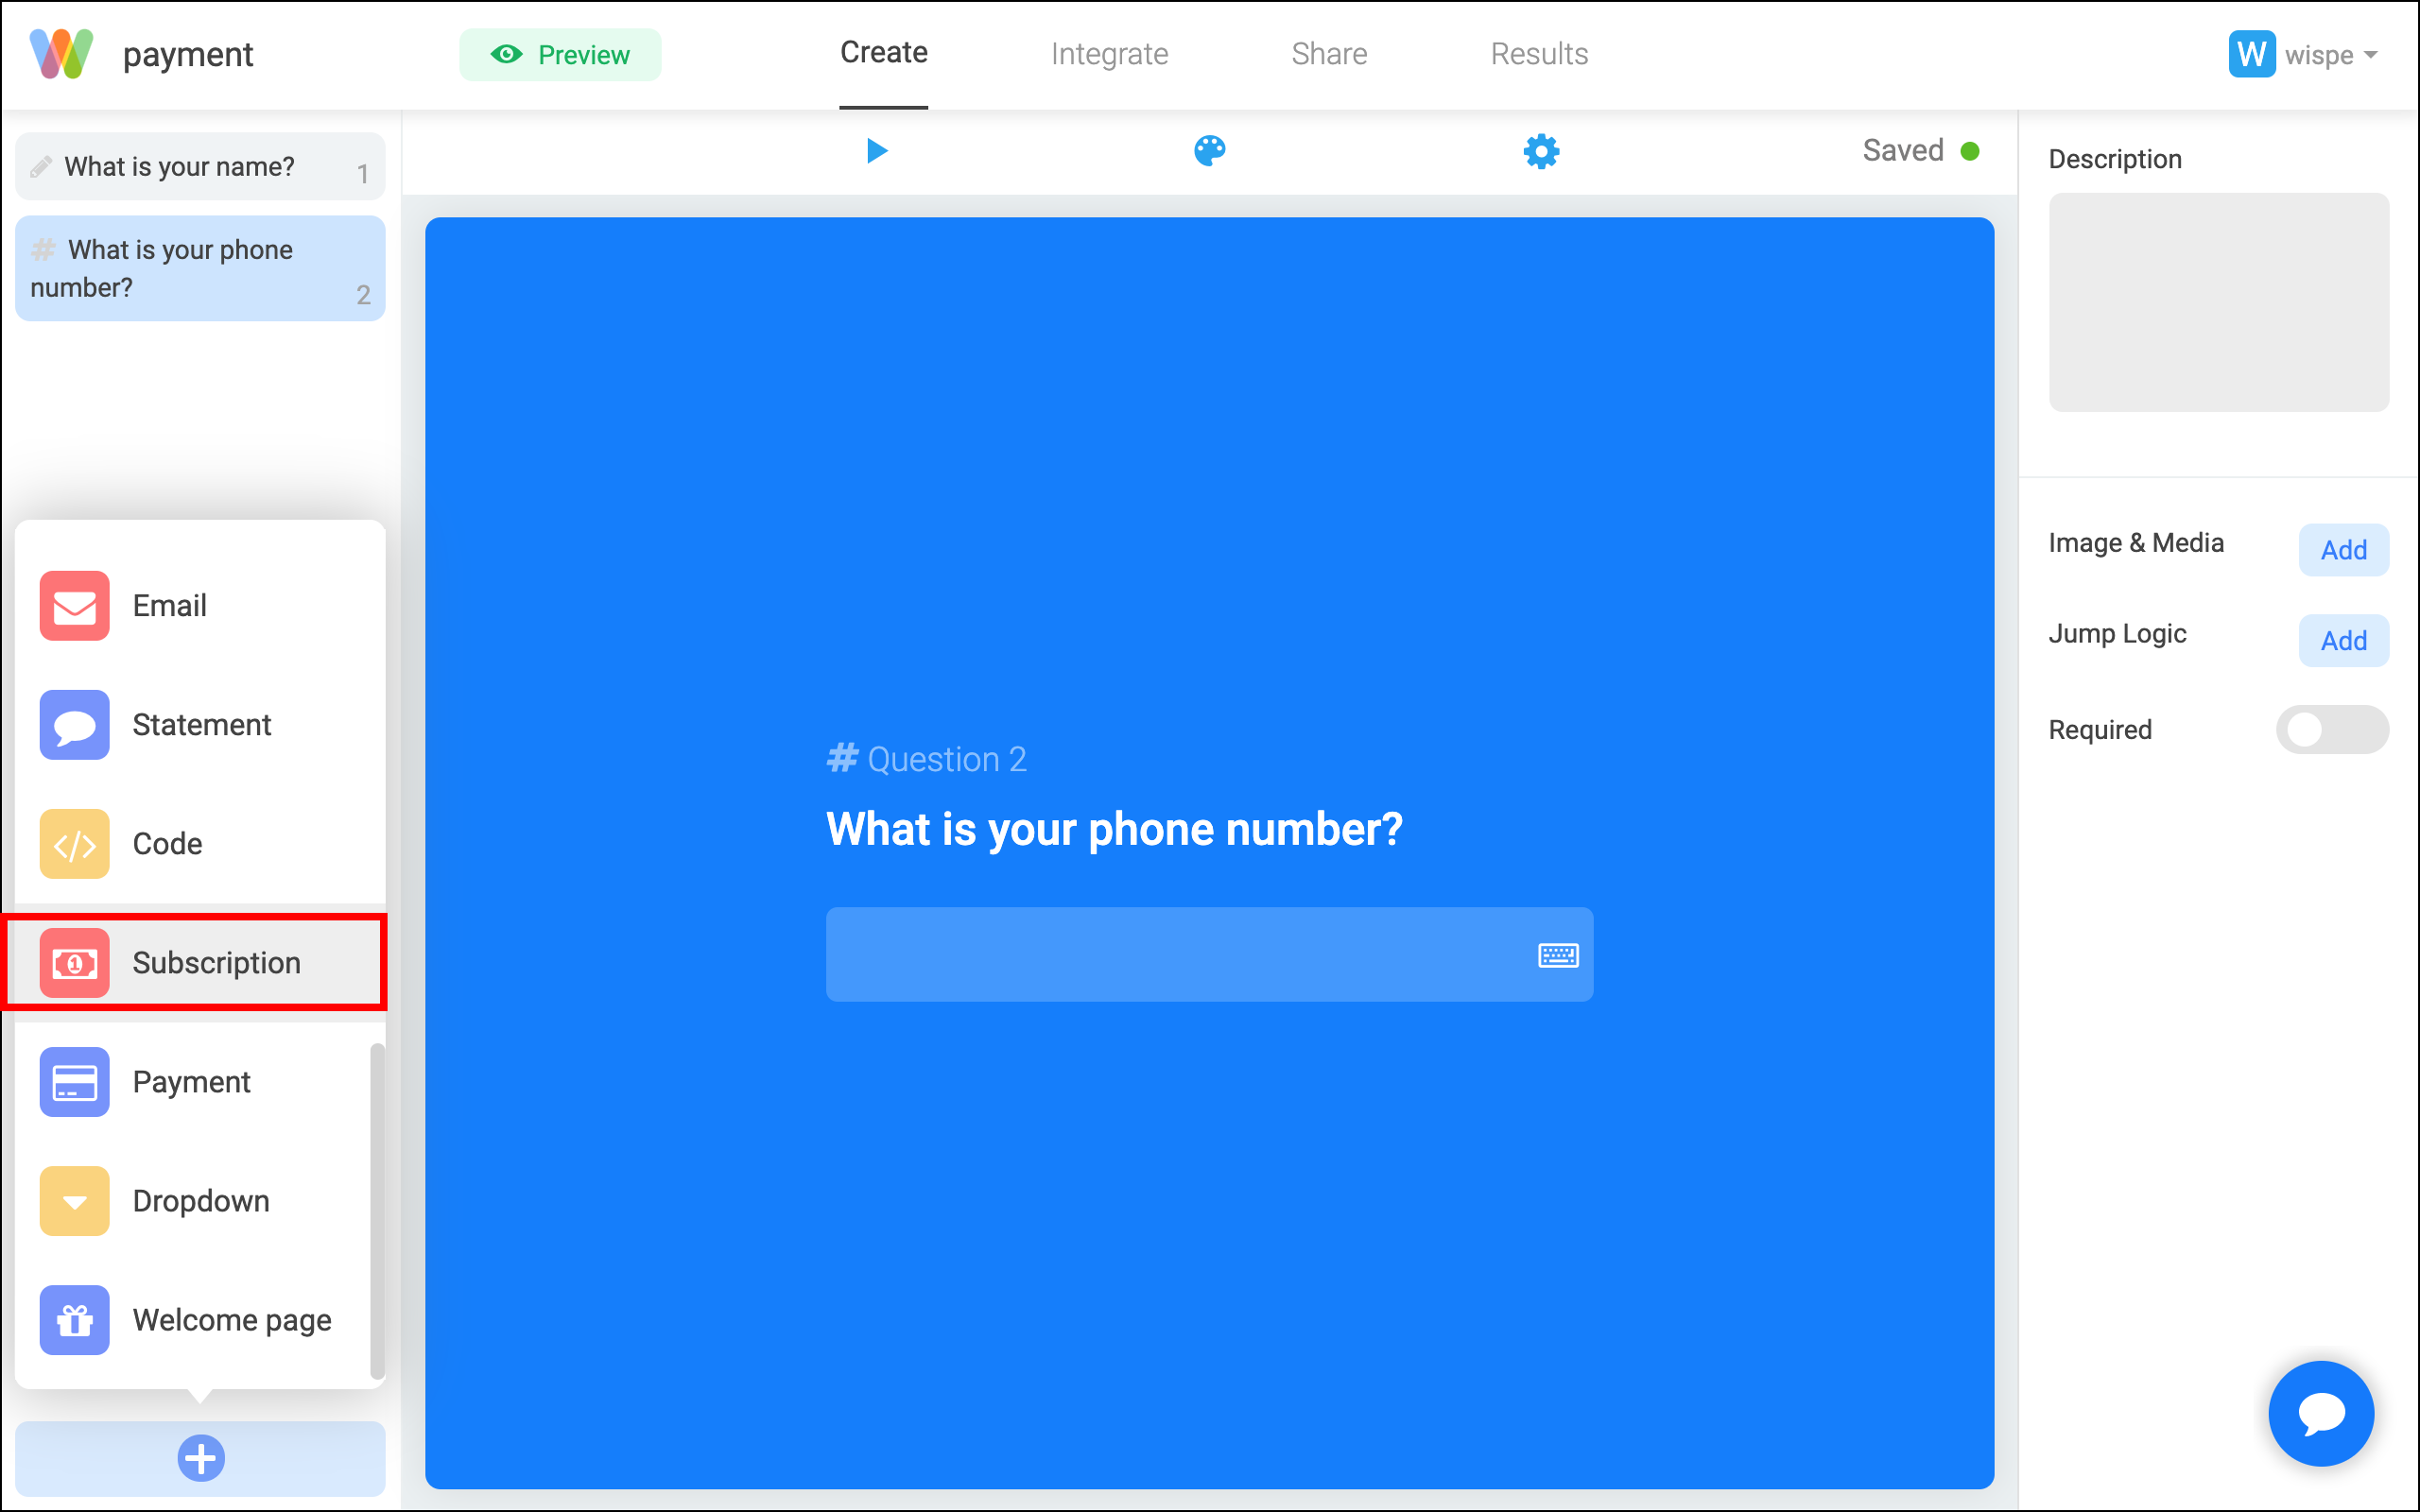
Step 1: Create a subscription question
To take in recurring payments from your users, you can setup your form as usual and add a subscription question where users can choose the plan they want to subscribe to as well as enter in their card information.
Step 2: Begin setting up your Stripe integration
If this is the first time taking payment or charging recurring payments, you will be prompted to setup or connect to a Stripe account. This is actually a very simple process that will take you a few minute. By spending this time, you are making transactions, bank information and credit card numbers much more secure since Stripe processes transactions for millions of businesses. Stripe is free to setup and takes a small percentage of your payment similar to any payment processor available. To continue, click the "connect" button on this screen.

Step 3: Create and link your Stripe account
You will land on a page where you can either connect an existing Stripe account or create a new Stripe account. If you already have an account, login using the prompt in the top right corner. If you don't please fill out information as accurately as possible. If you do not have a registered business, you can still accept payment by choosing sole proprietor as your business type.

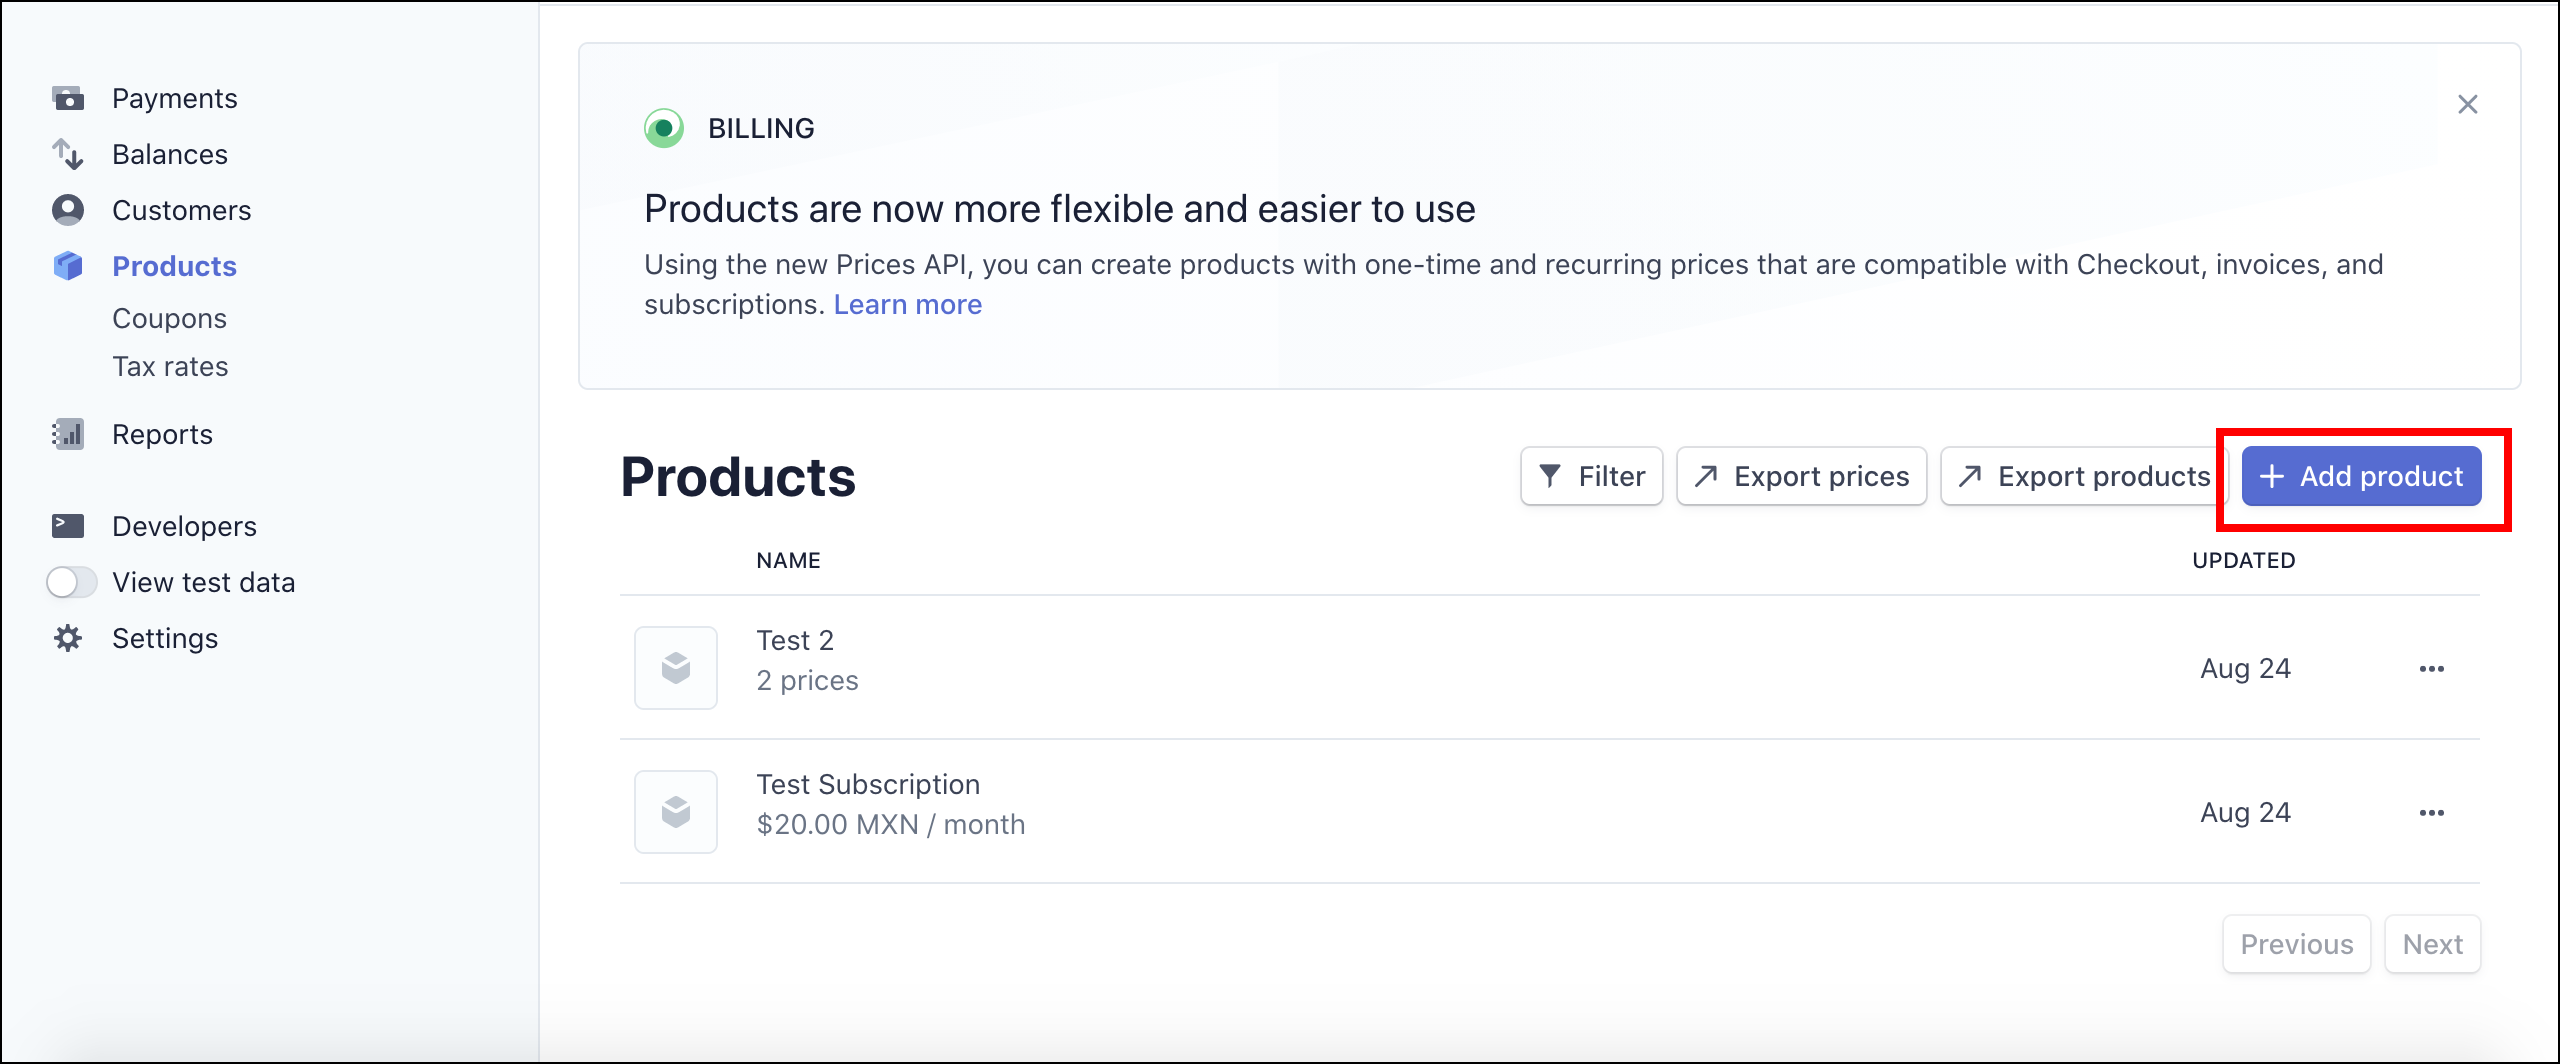
Step 4: Create a subscription product in Stripe
Once you have connected your stripe account, you can login to Stripe and create a subscription plan. Simply click Product on the left navigation in the Stripe dashboard and hit "Add Product". In this example, the account already has 2 different products. If this is your first time setting it up, there will be no available products.
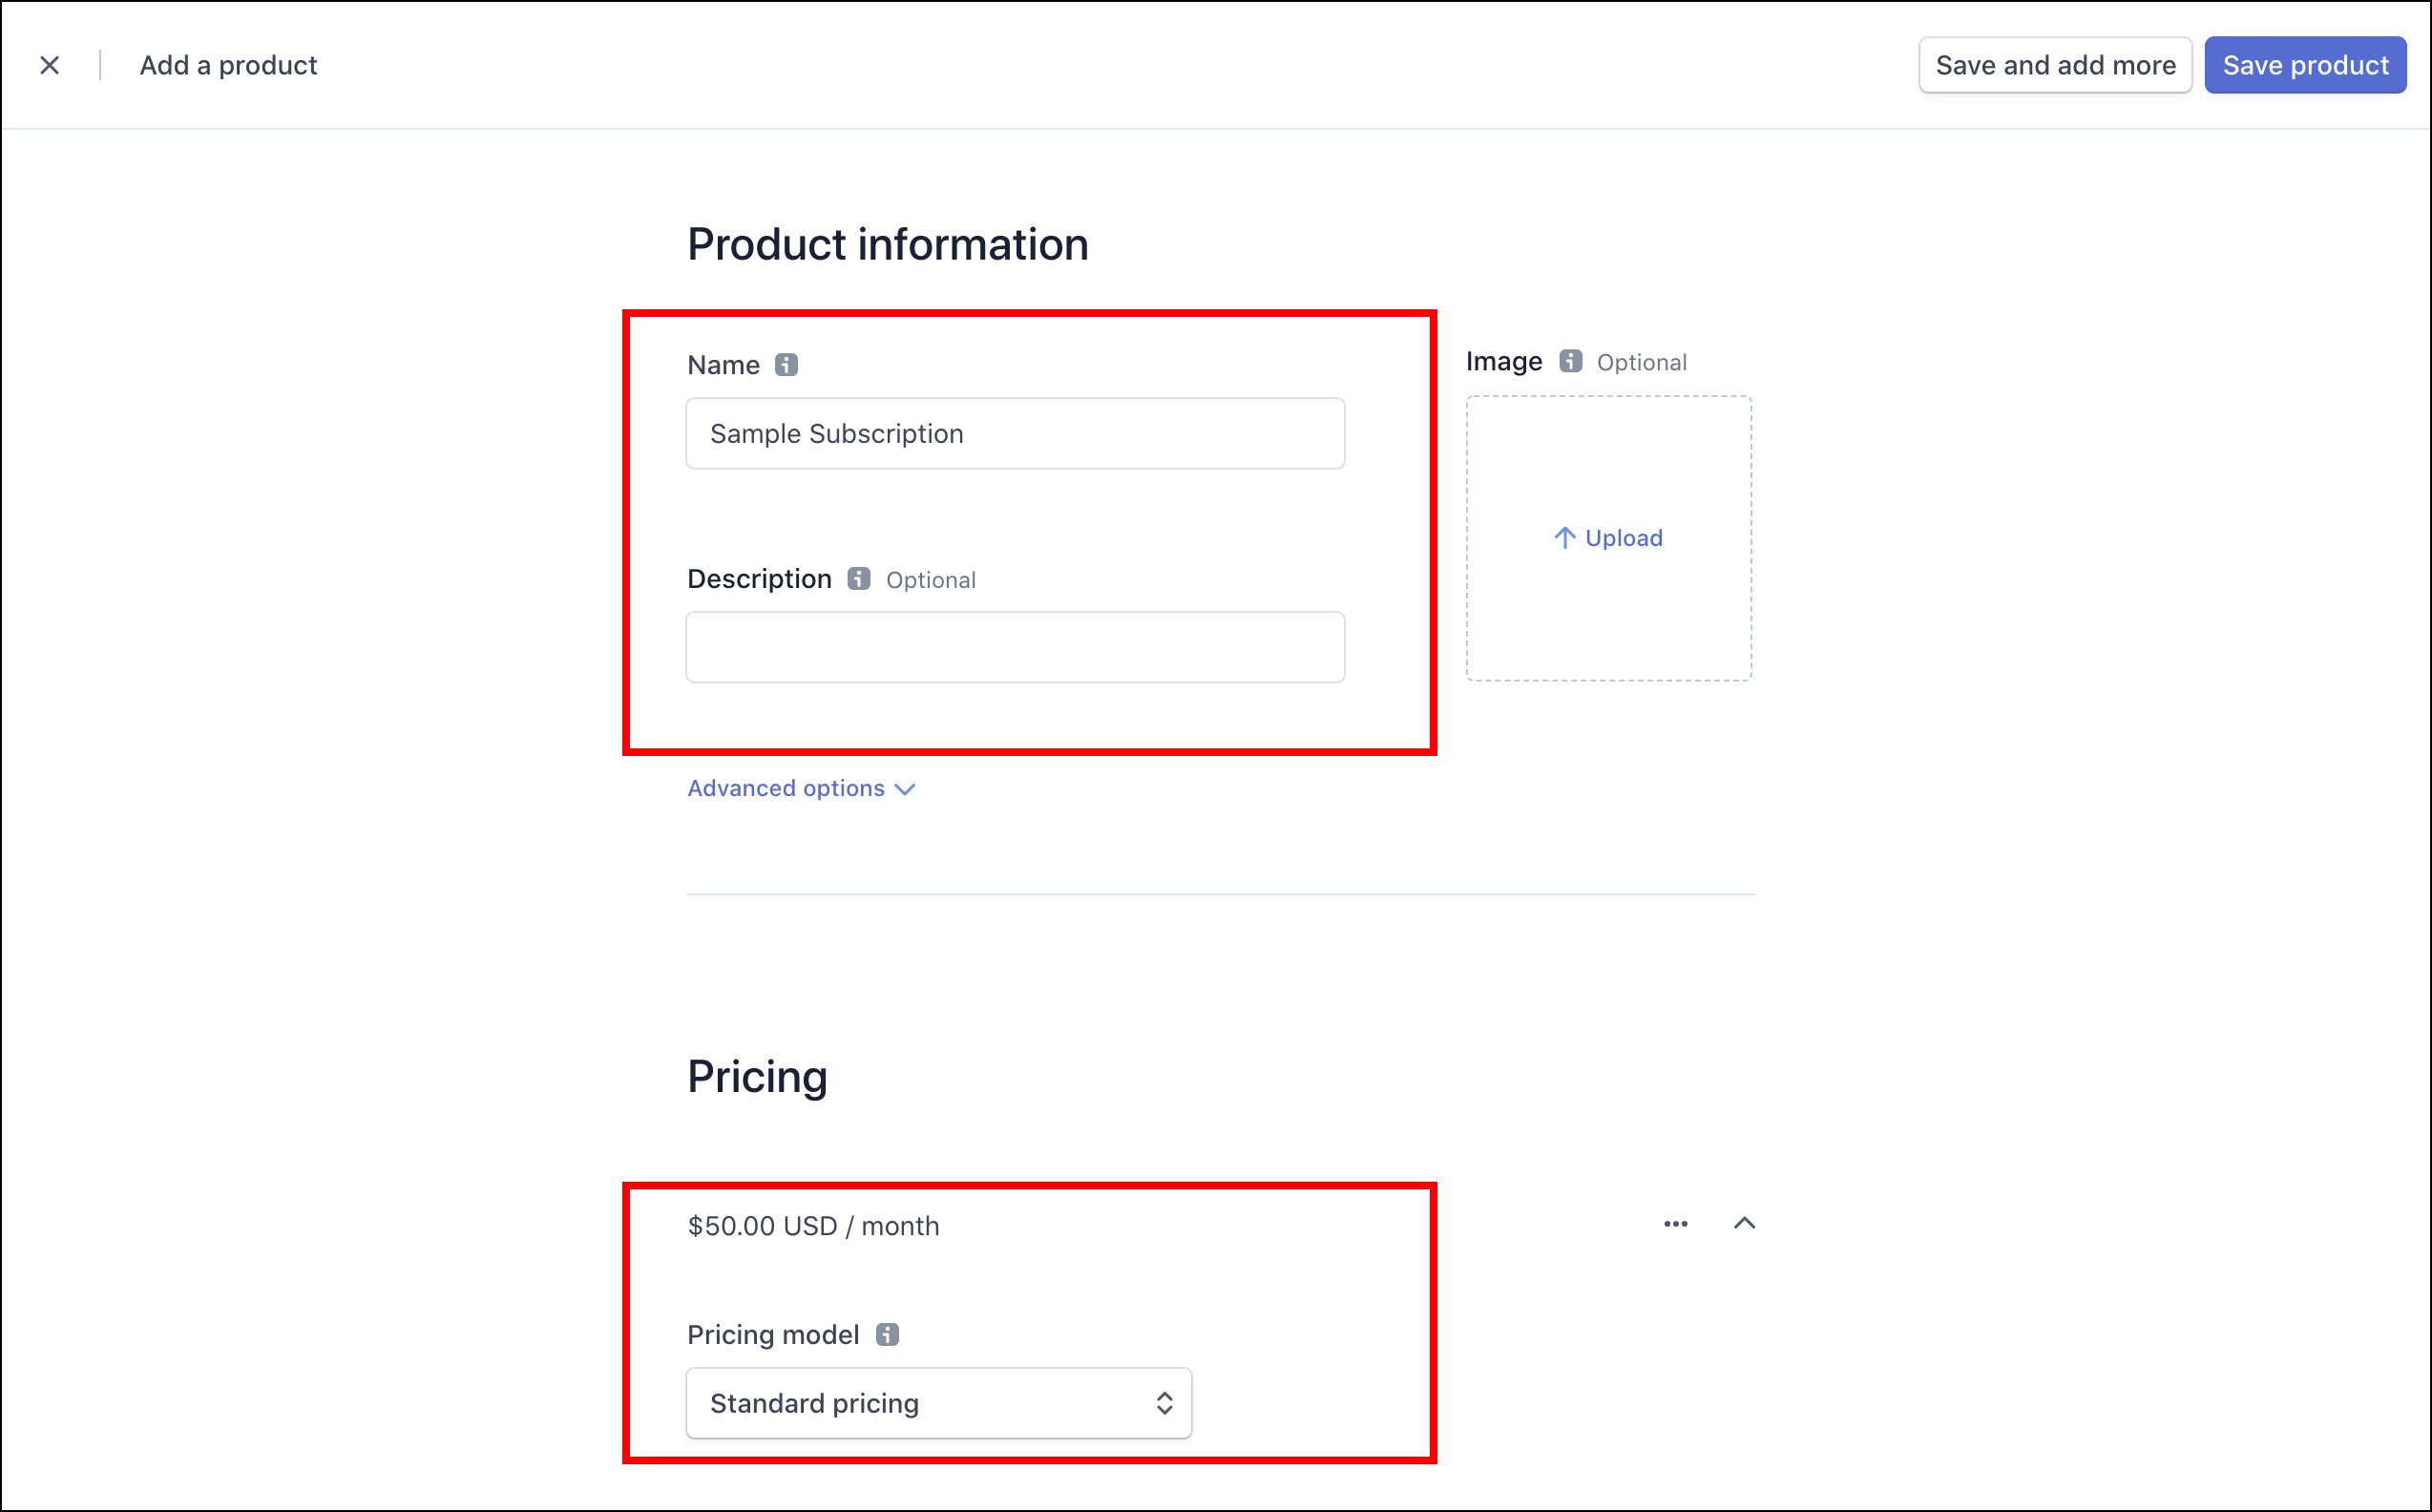
Step 5: Enter in product details
In the product creation flow, you will be prompted to enter a few different information regarding the product. Since Wispform will sync these products into your form, please make sure the name of the product you are entering is what you want your users to see in your form. For pricing, you can choose recurring (monthly, annually etc.) or you can choose one time.
Step 6: Go back to Wispform and create a subscription question
Now that you have a Stripe account as well as products setup in Stripe, you can actually go and create a subscription question now. Click the button shown in step 1 and you will see a subscription question show up with the subscriptions automatically populated from Stripe. You can enter in some text for this question or "edit" the "available plans" (by default, all the possible plans/products are synced in from Stripe)
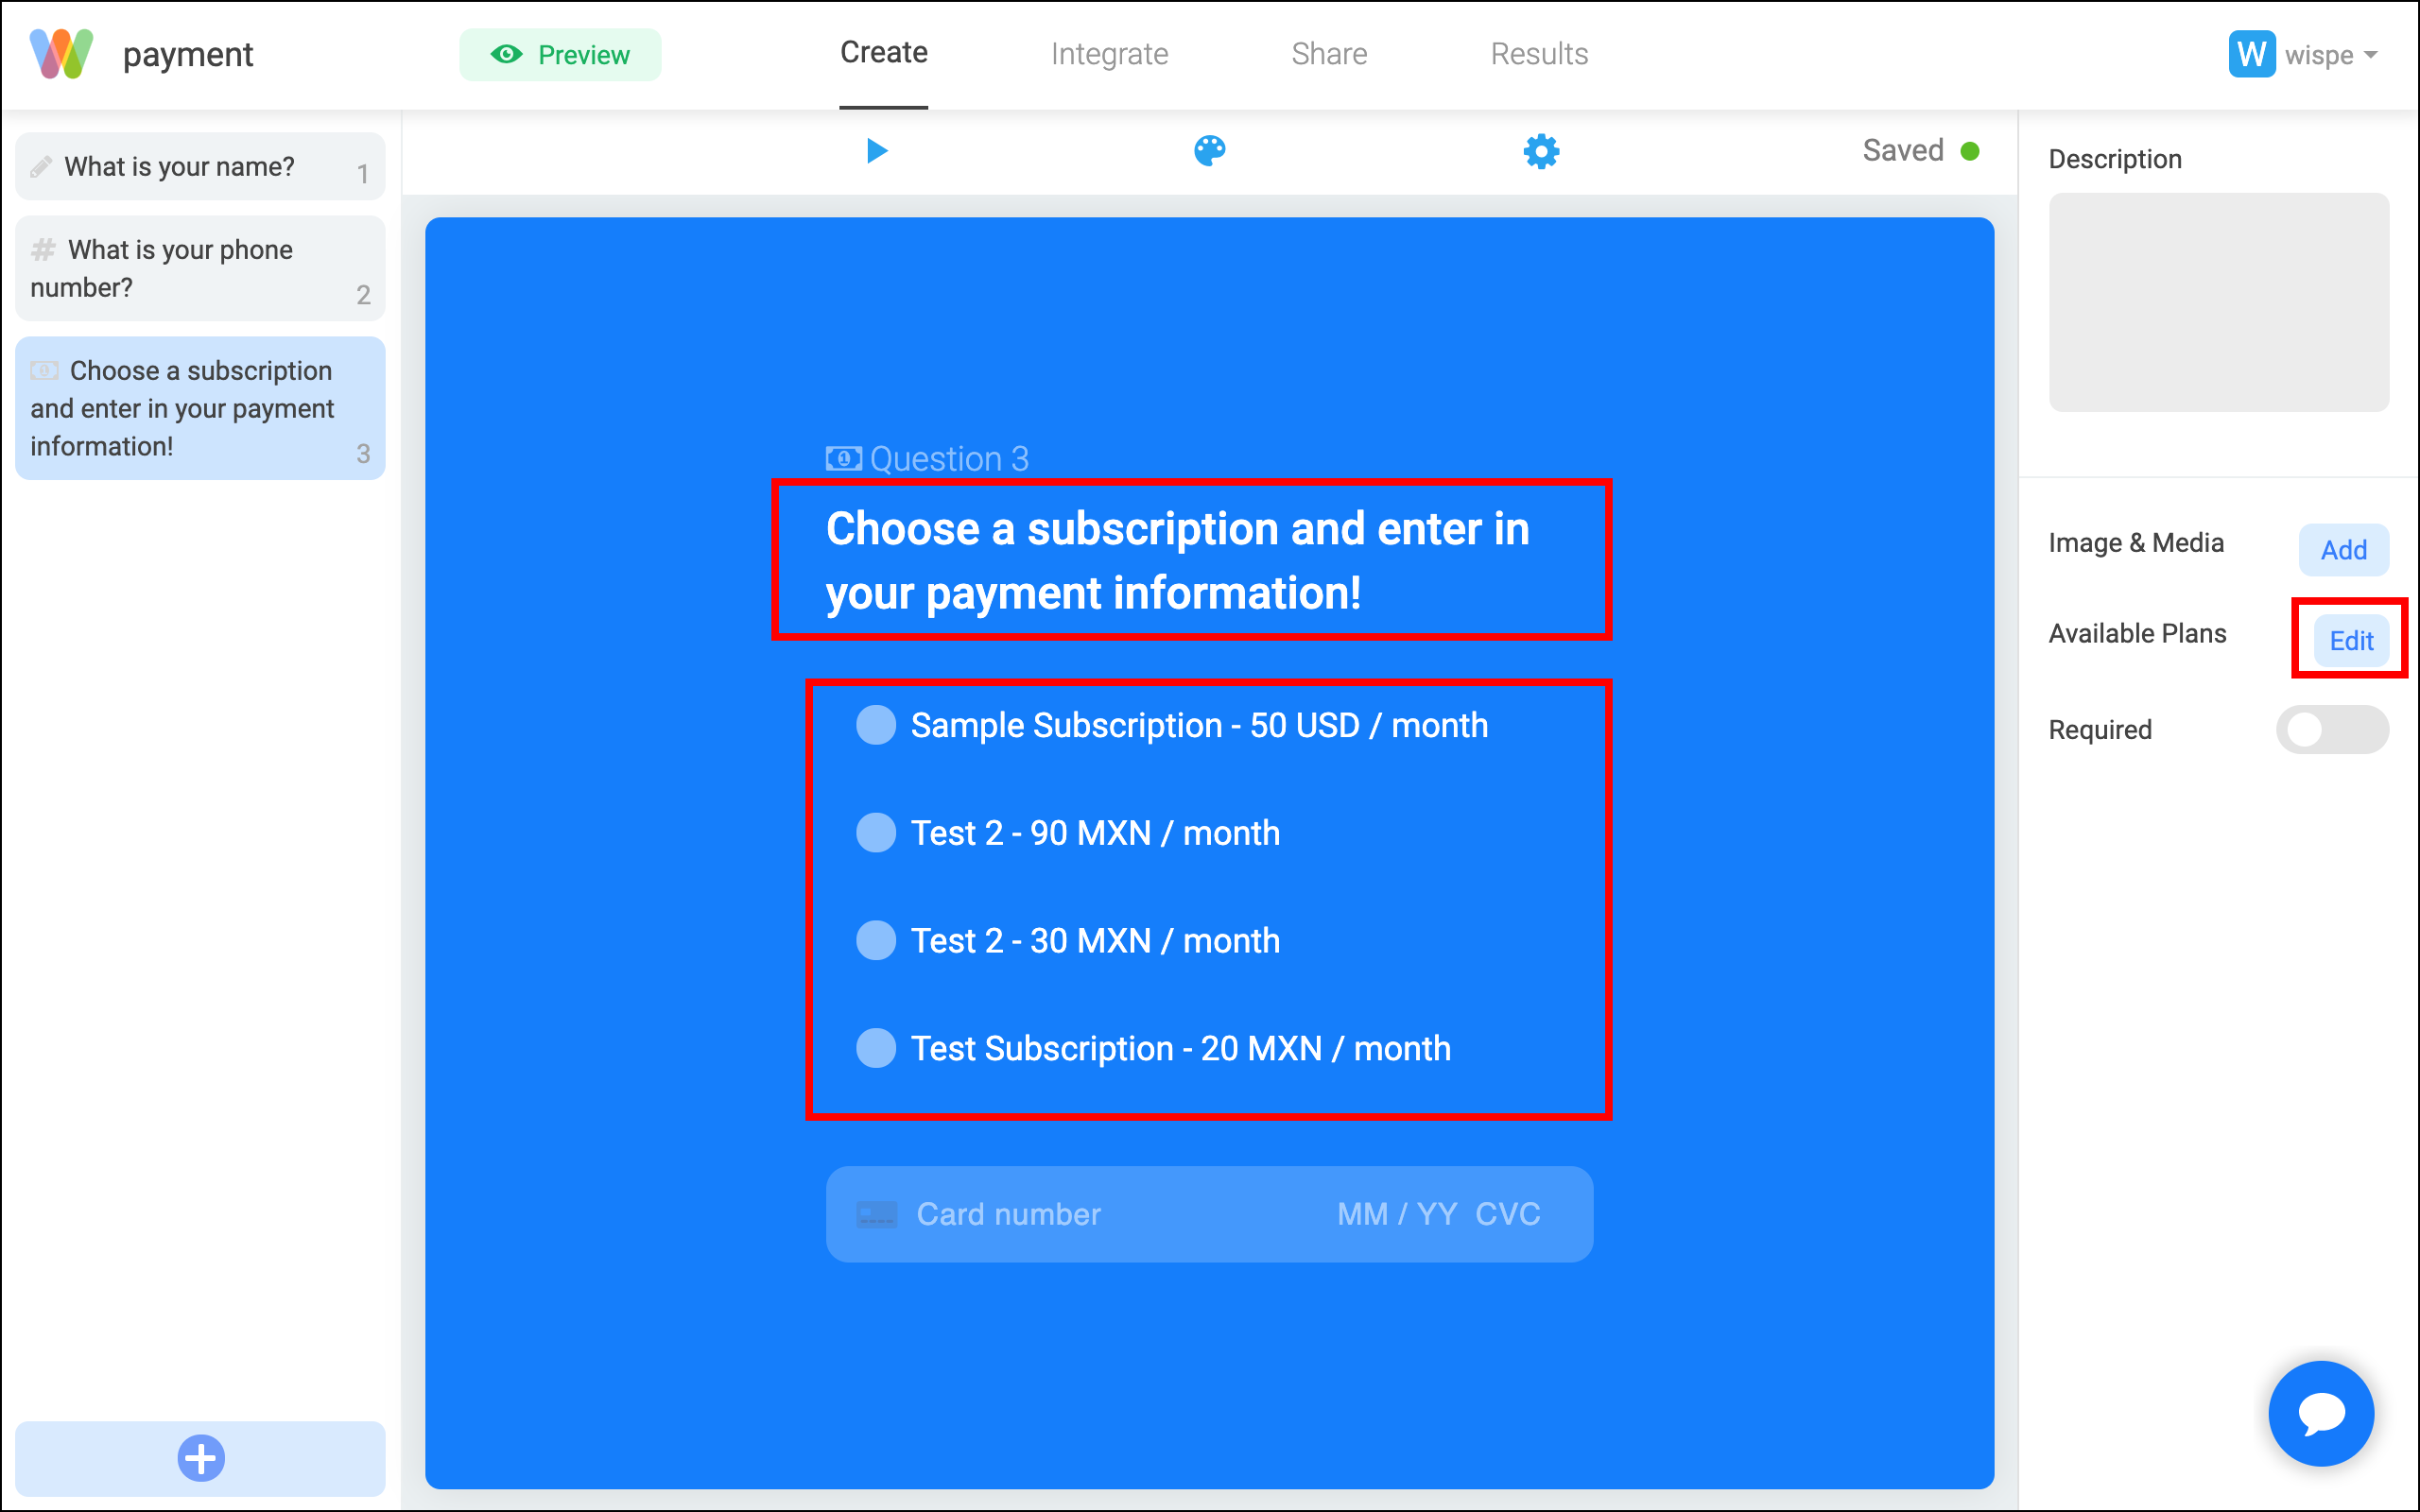
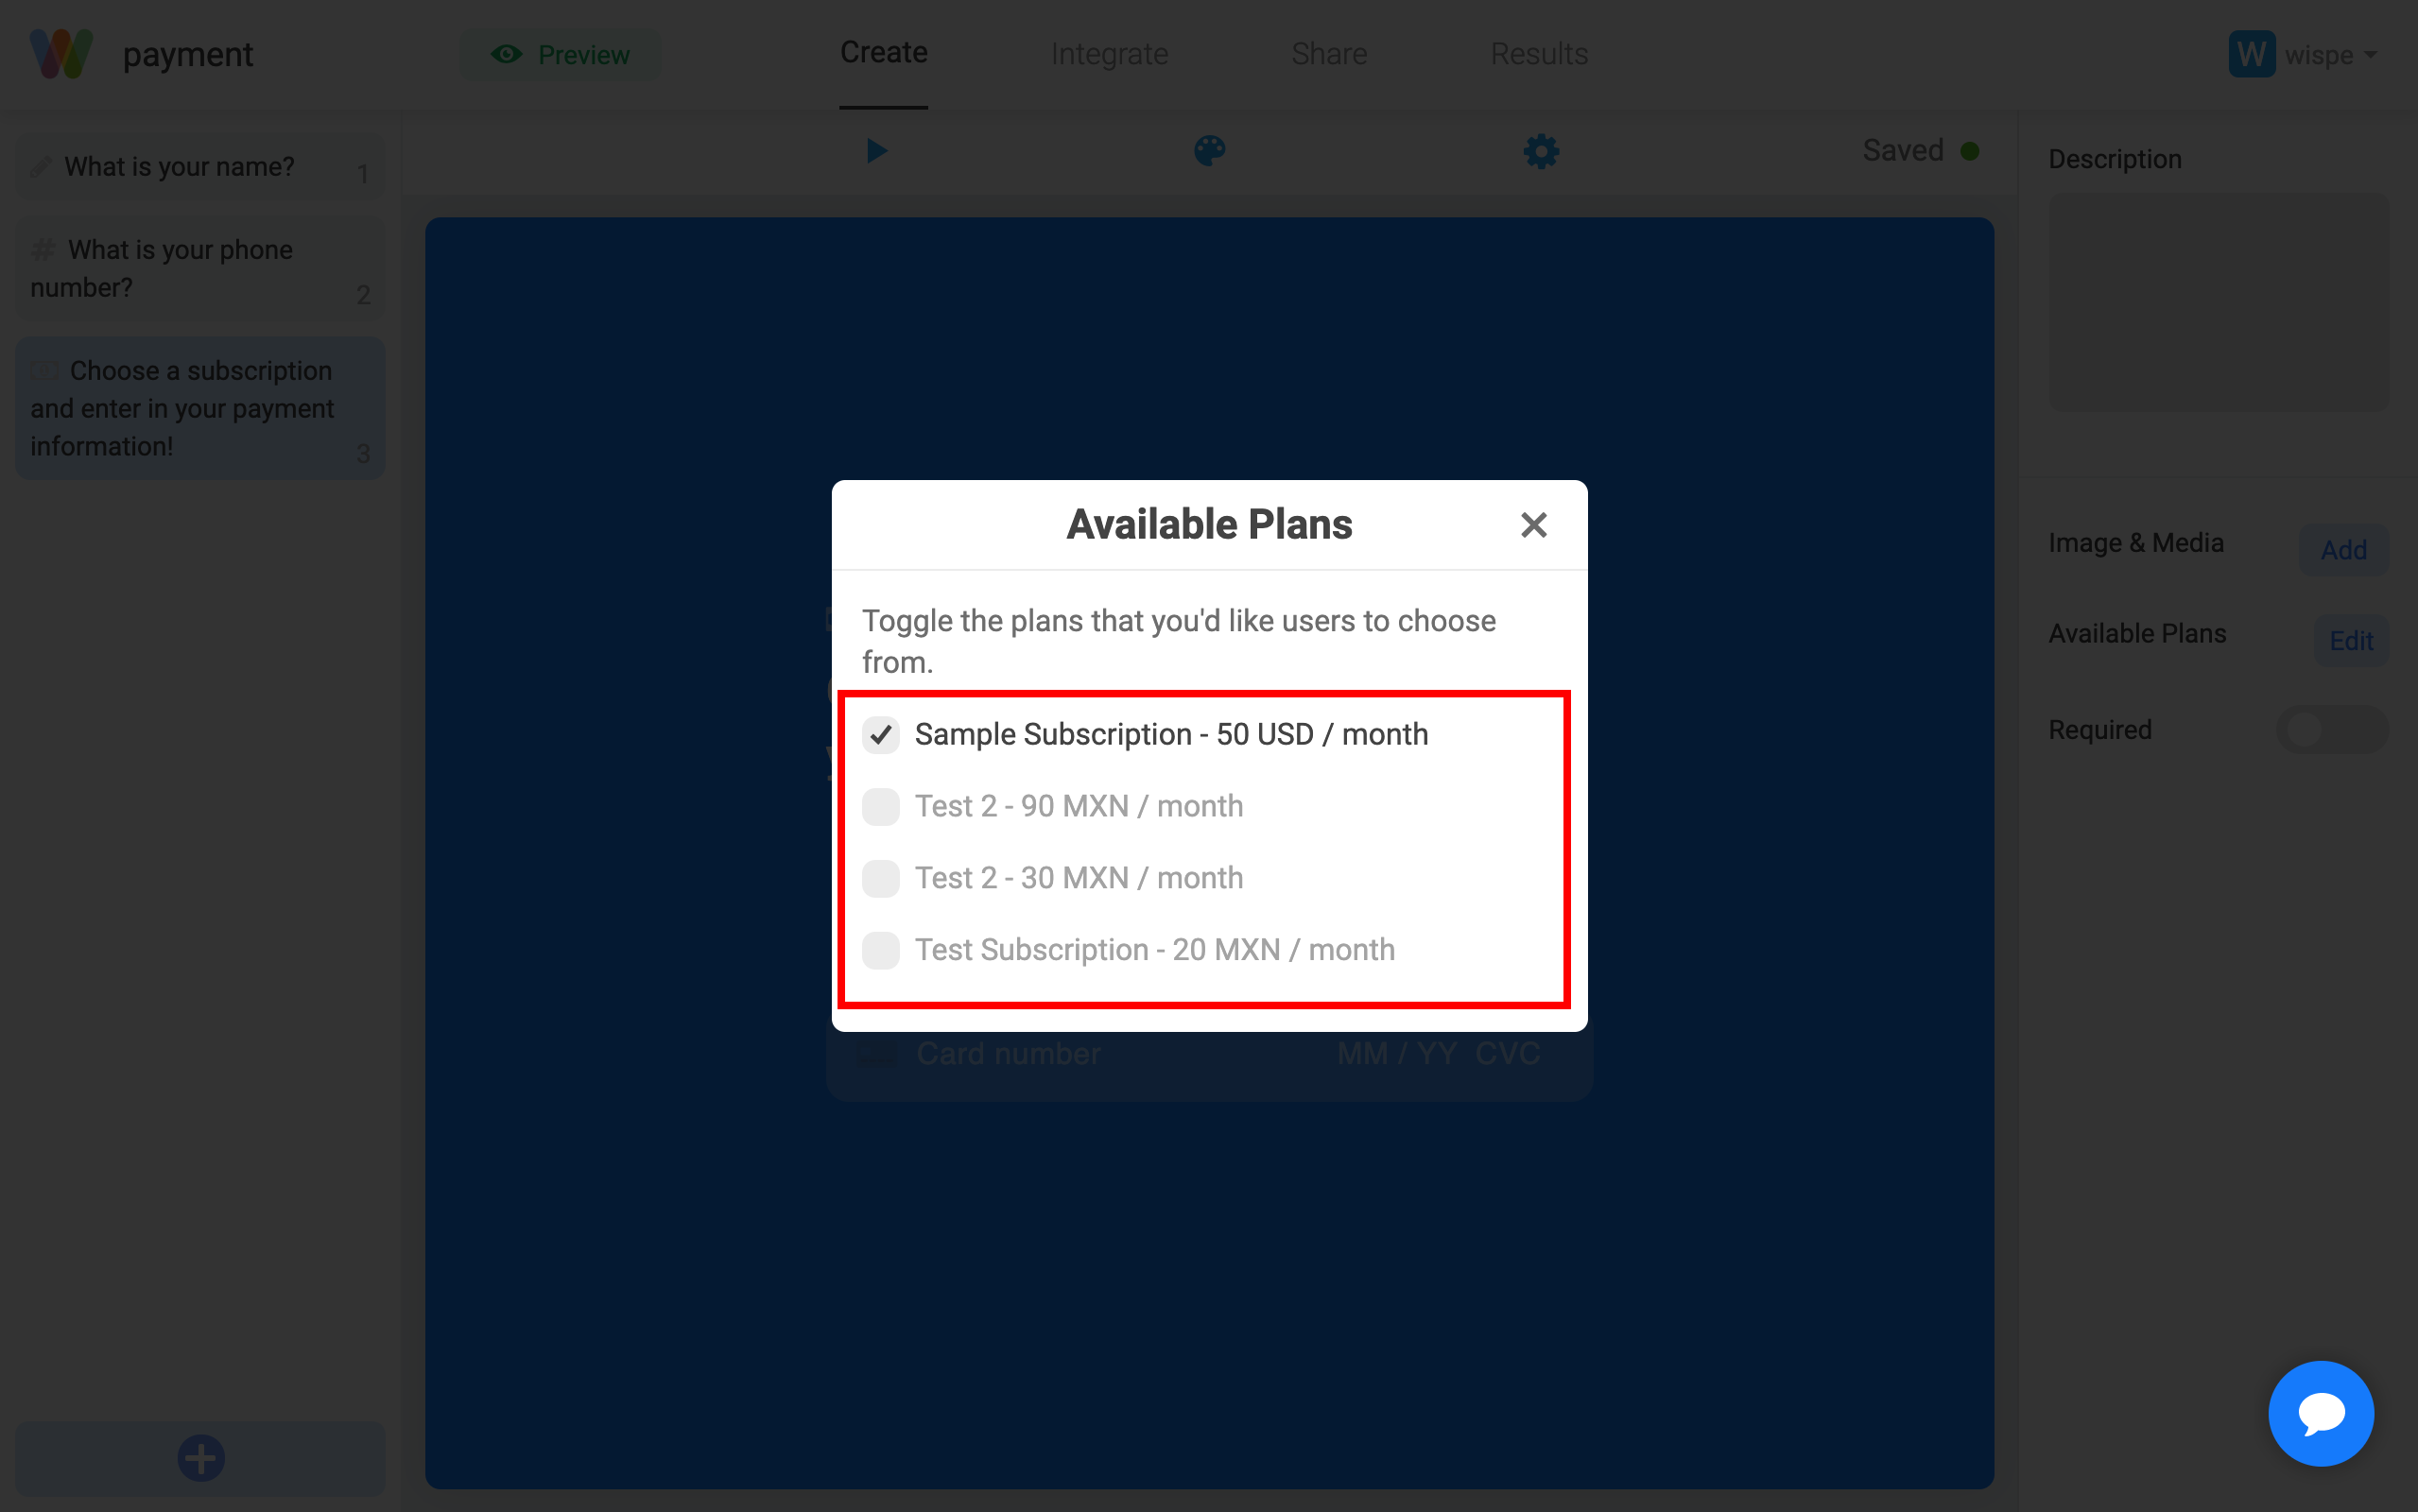
Step 7: Remove unnecessary plans
Although all the subscriptions and products are automatically brought into Wispform from Stripe, you can always unselect the ones you don't want to show in your forms.
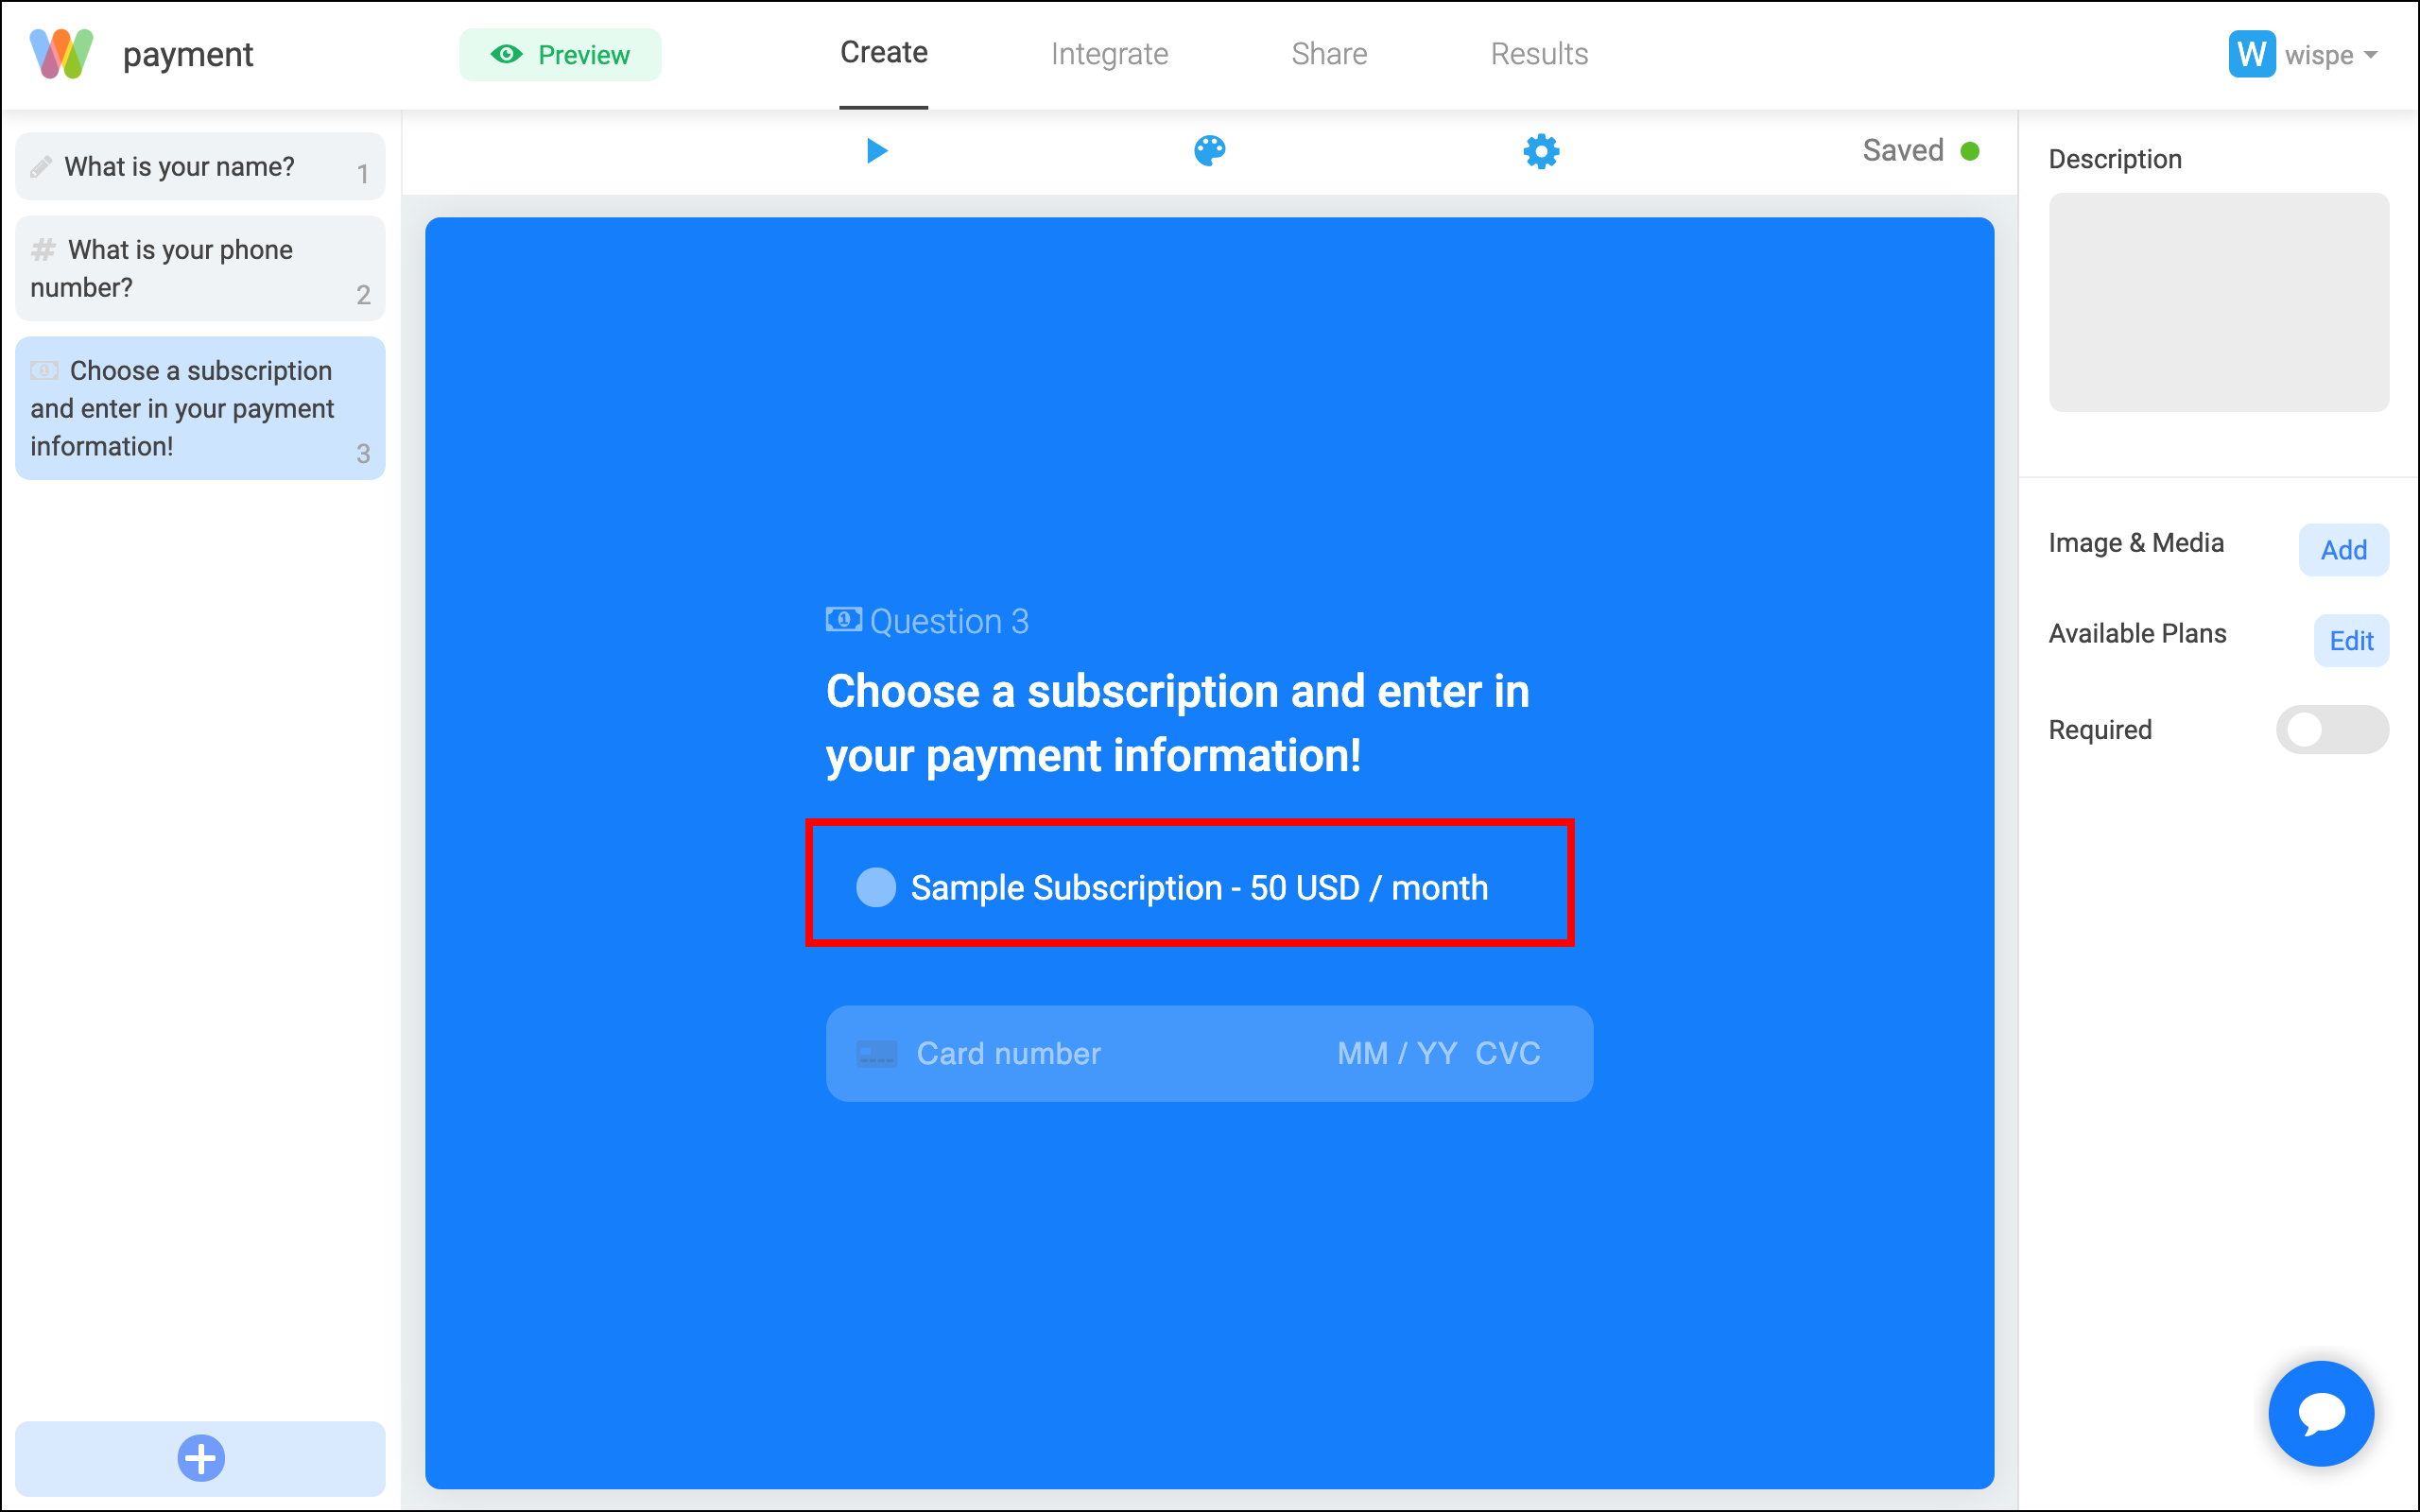
Step 8: Subscription question completed
Now that only the subscription we just created is shown, our subscription is finally ready for users to use. You can finish building your form and go share it with others to start taking in recurring payments.
Once you have completed these steps, your forms will now be able to charge recurring payments from your users. Give it a try and feel free to reach out if you have any questions using the chat bubble on the bottom right. This is a relatively new feature and we always welcome feedback from our customers.
Related Article
- How to customize your Thank You Page
- How to setup logic jump for your form
- How to embed or share your forms