Create a scored quiz with different outcomes
You can use Wispform to easily create a quiz with a score and show that score to your responders. You can even use the score to decide which thank you page (outcome page) to show to your user based on how they performed.
Contents covered in this tutorial
- Configuring score on specific questions
- Show specific thank you page (outcome page) based on the user's score
- Show the score that the user received on the Thank You page
Related tutorials you might be looking for
- Create a quiz that maps users to one or multiple outcomes based on their choices
- Create a quiz/calculator that has multiple variables calculated by math formulas
Score and multiple outcomes are paid features. If you are on the basic tier, you will be prompted to either try the feature or upgrade to any of our paid plan for $10/month.
Part 1: Configuring score on specific questions
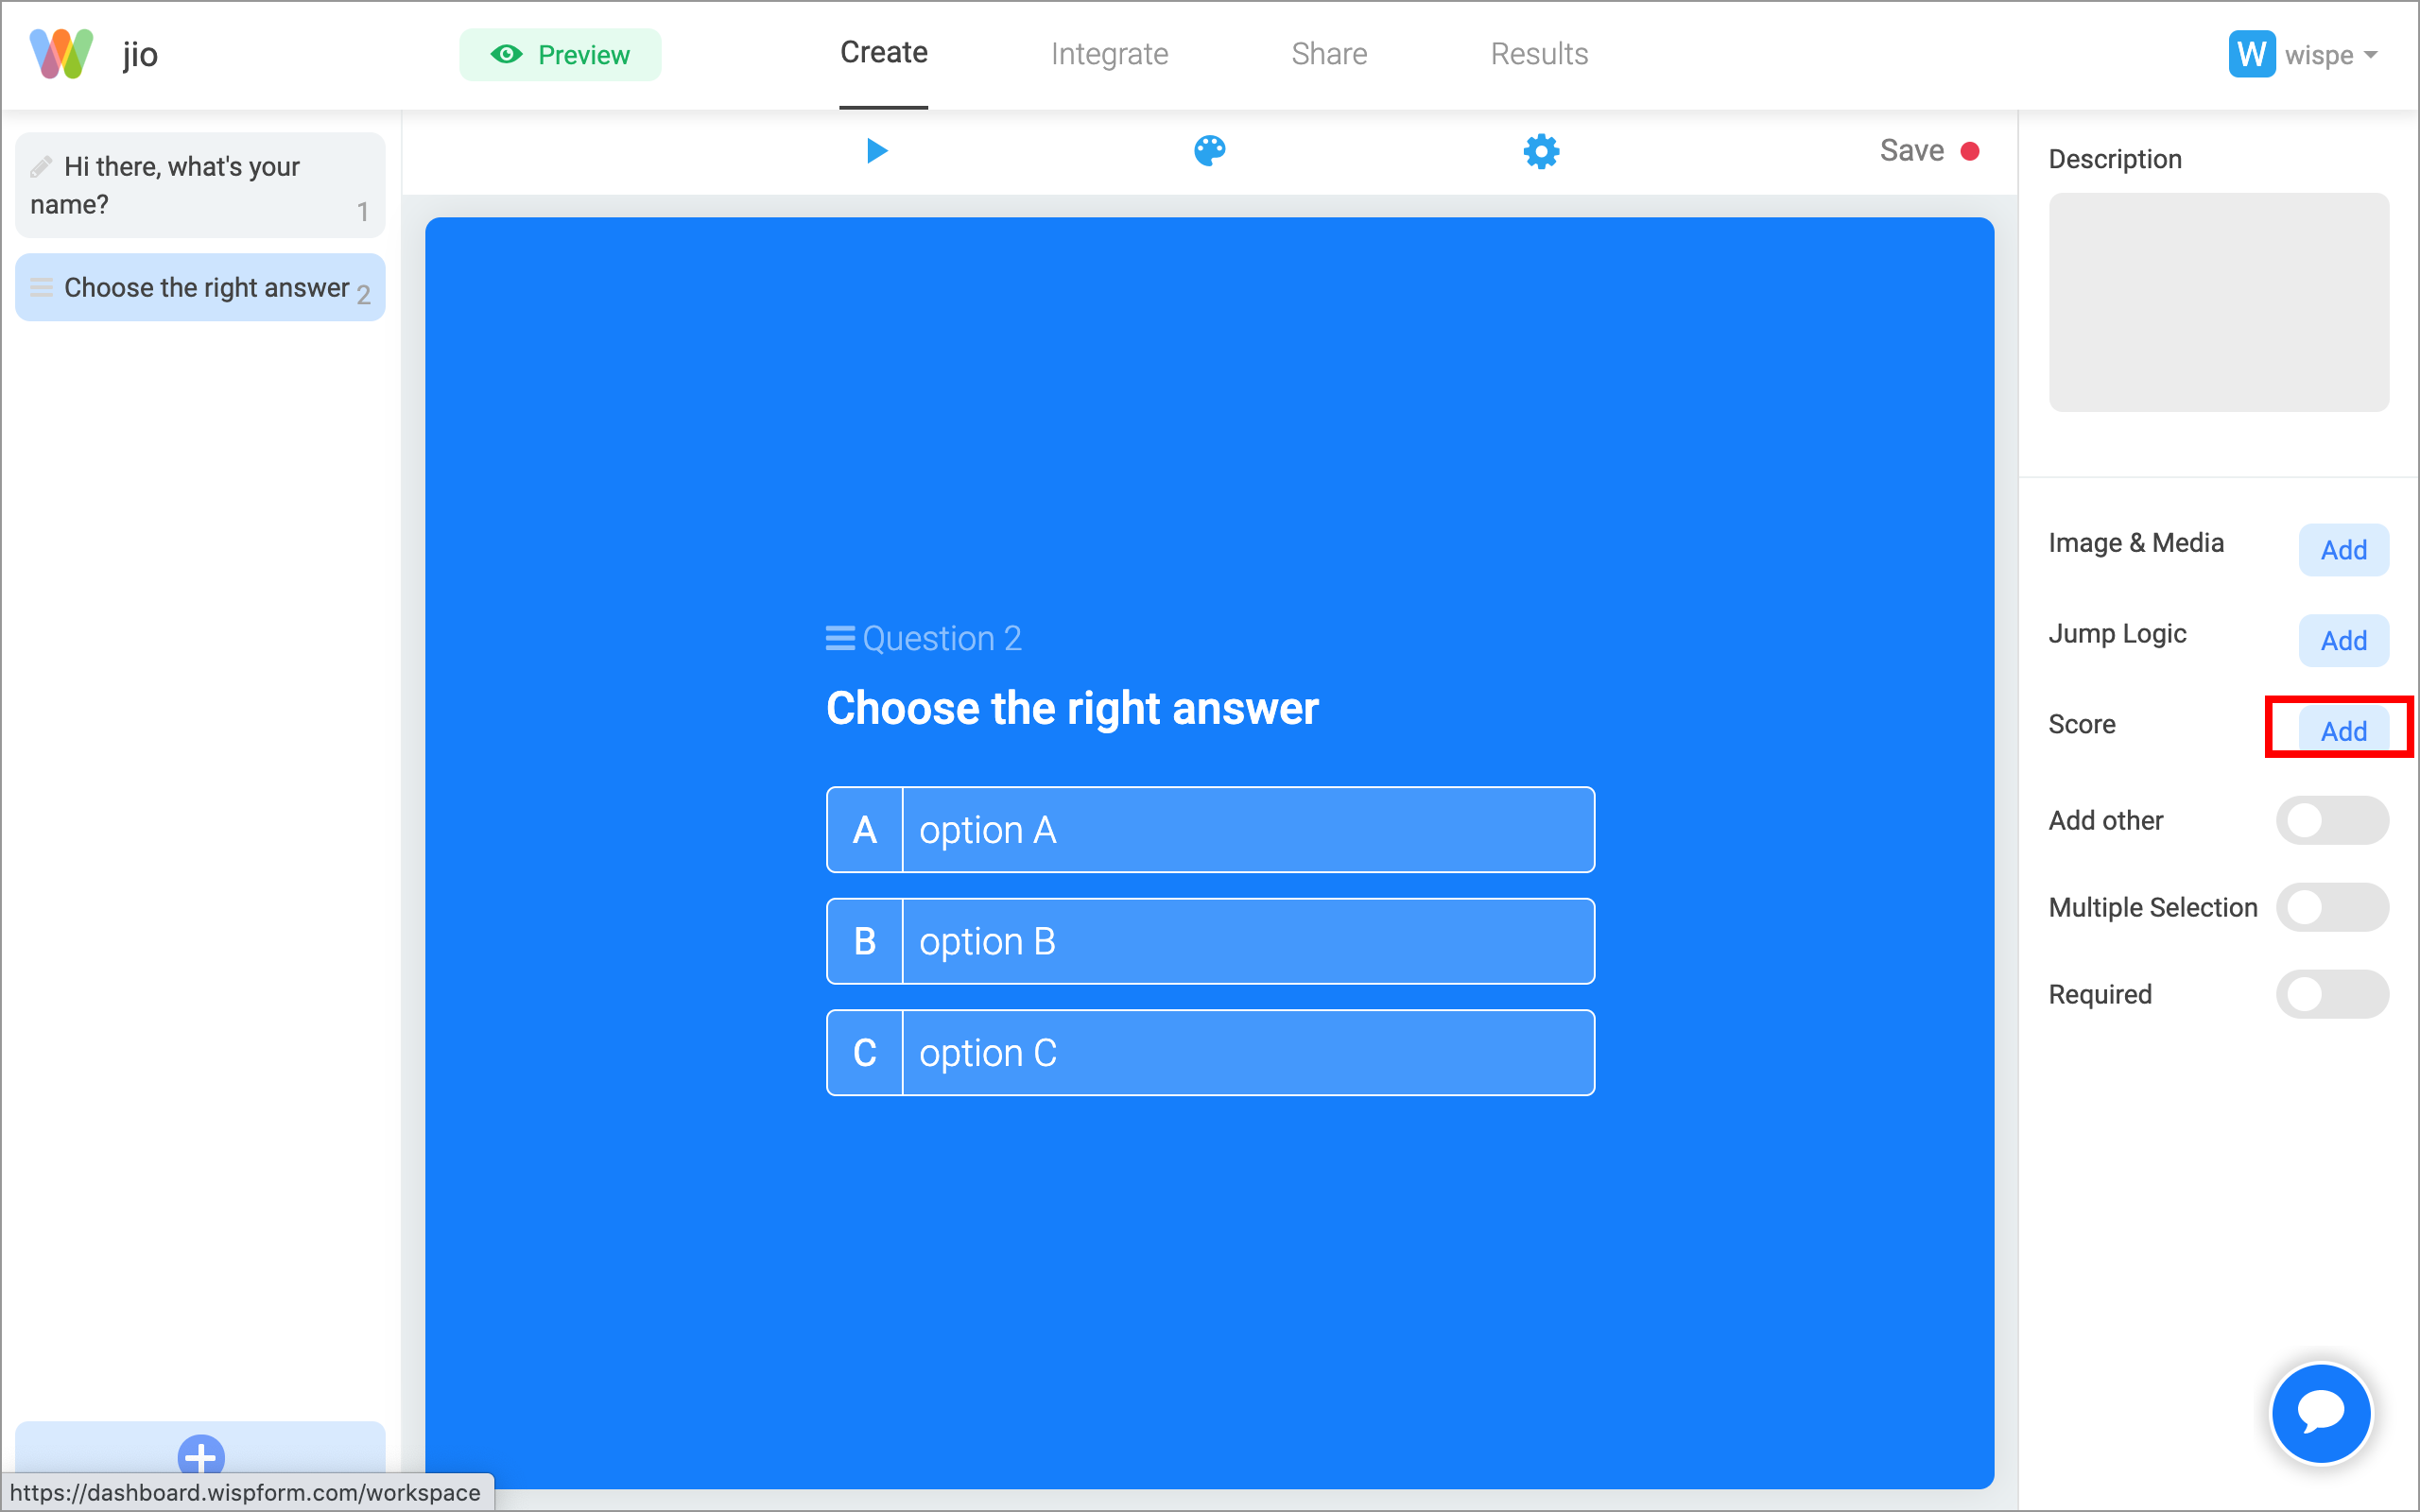
Step 1: On any choice based question like multiple choice, picture choice, opinion scale, and rating questions, you can configure the score by clicking on the score button on the right
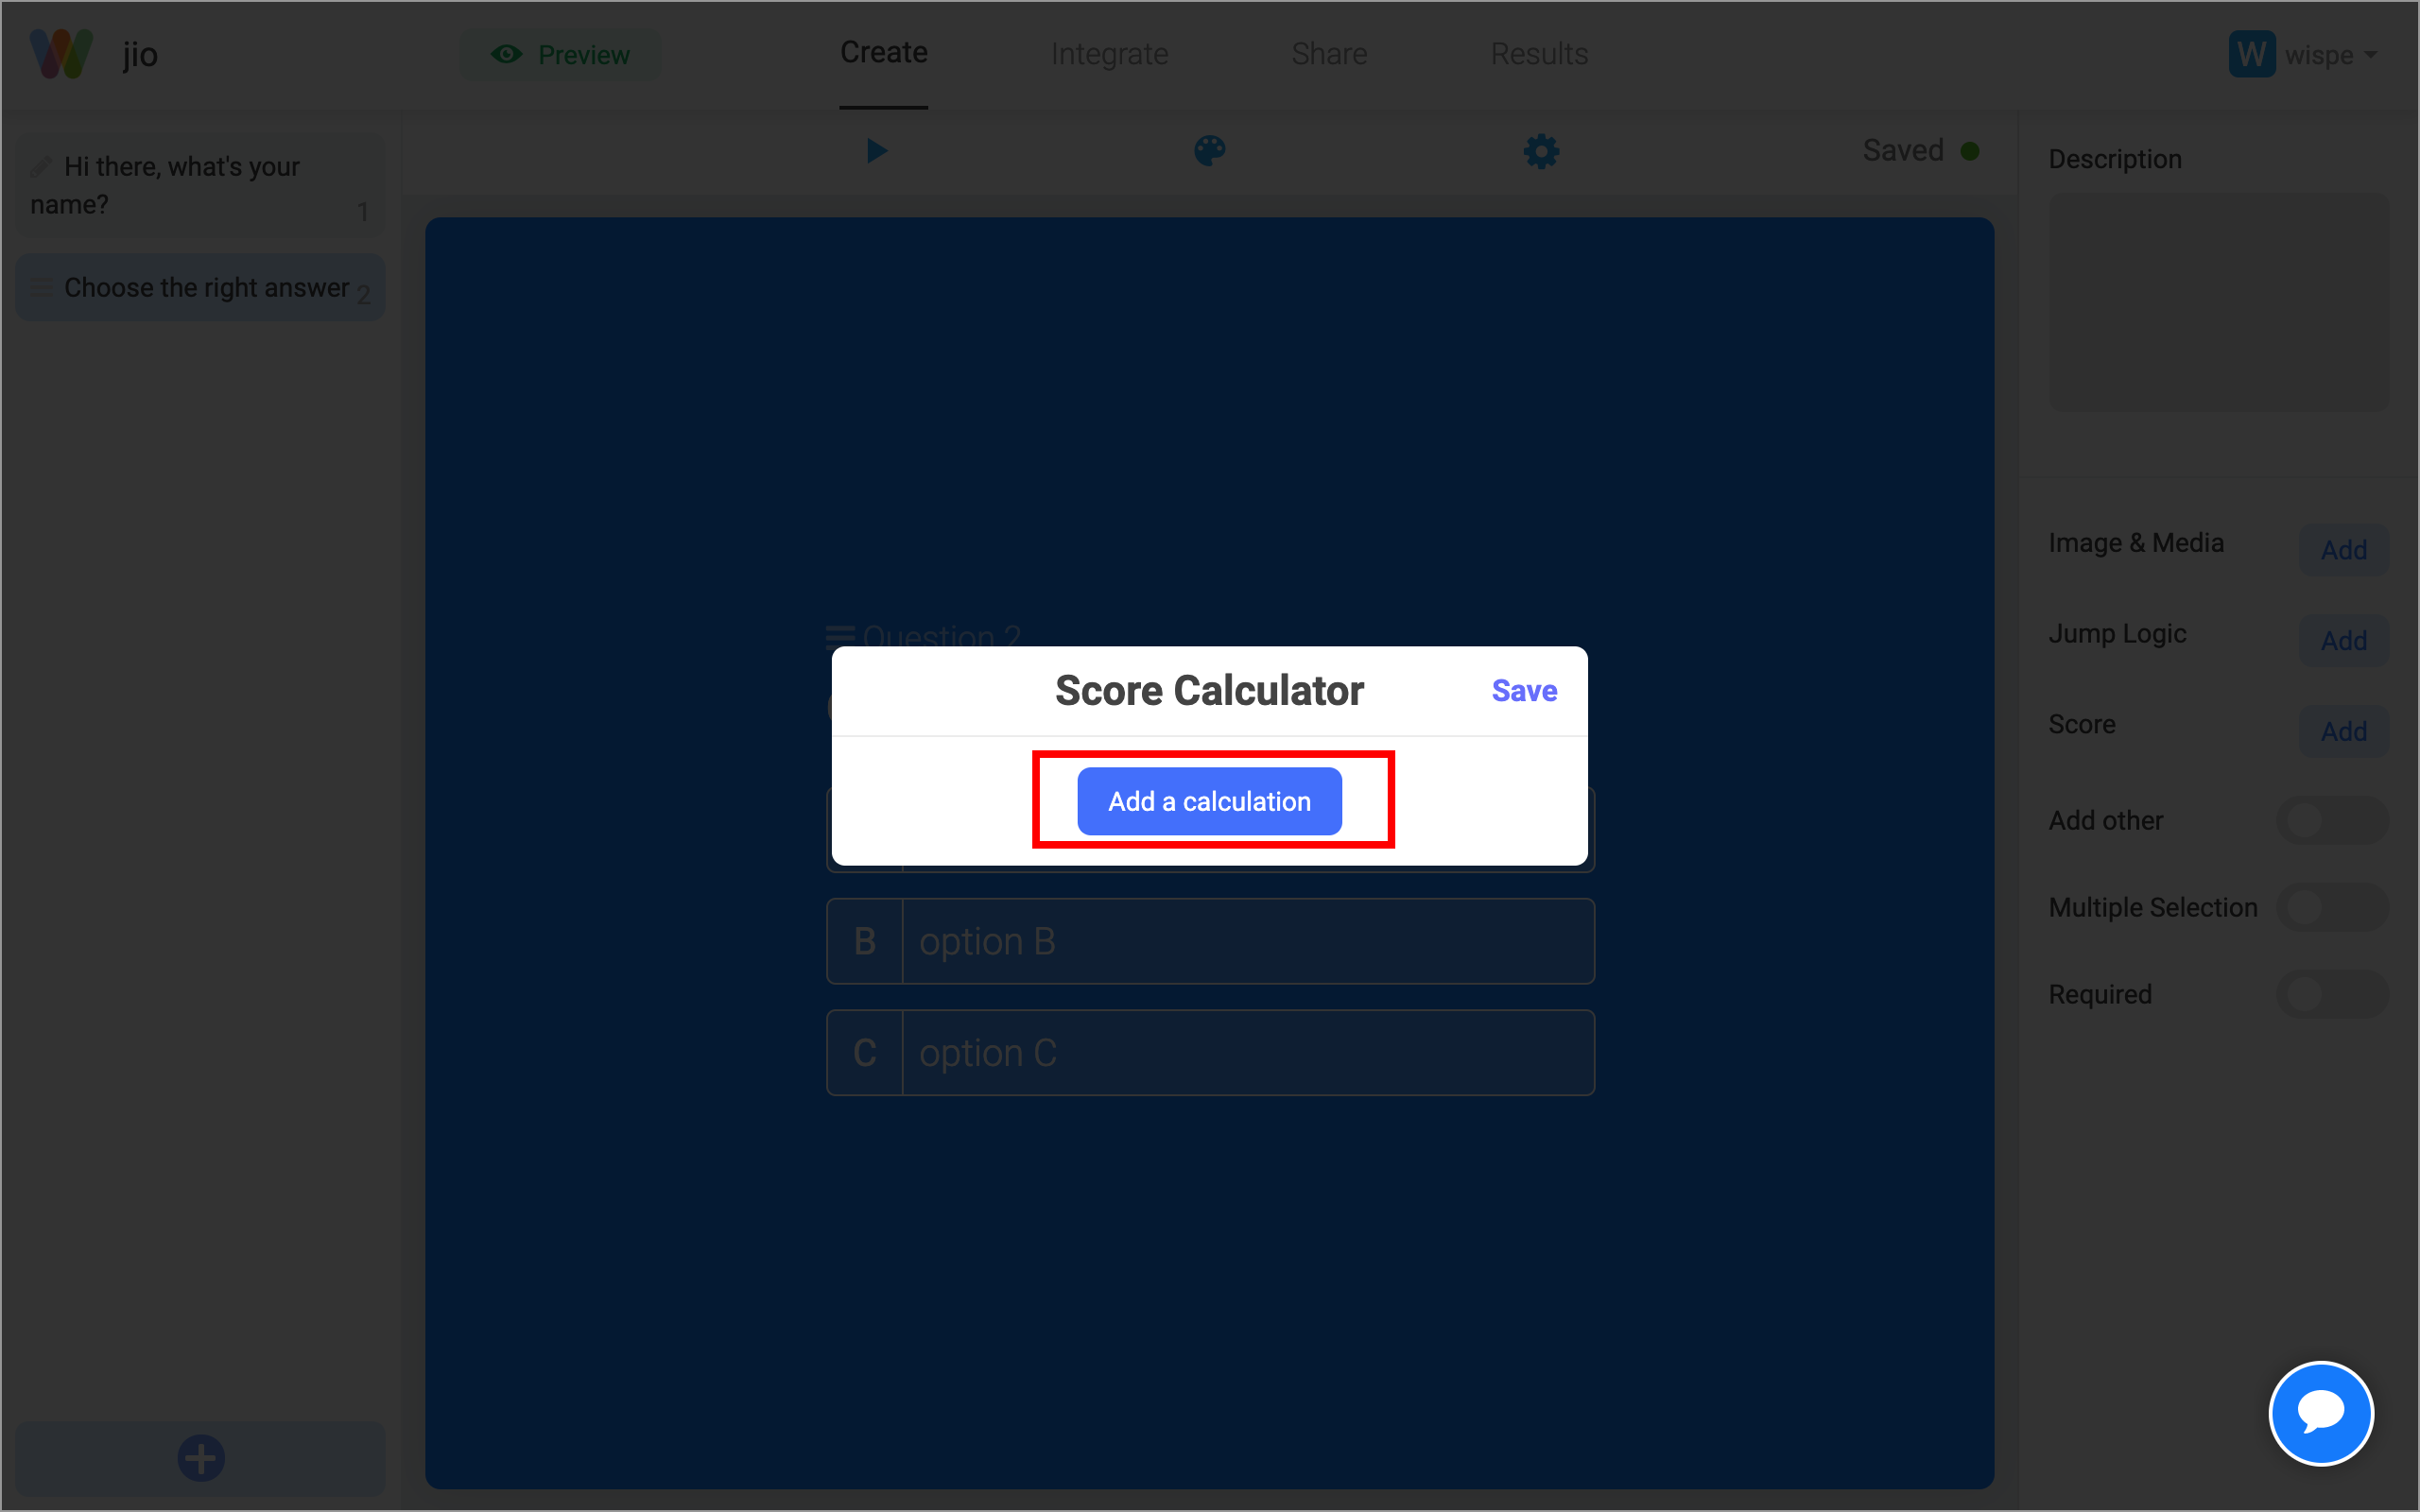
Step 2: Click add a calculation to configure your first score calculation
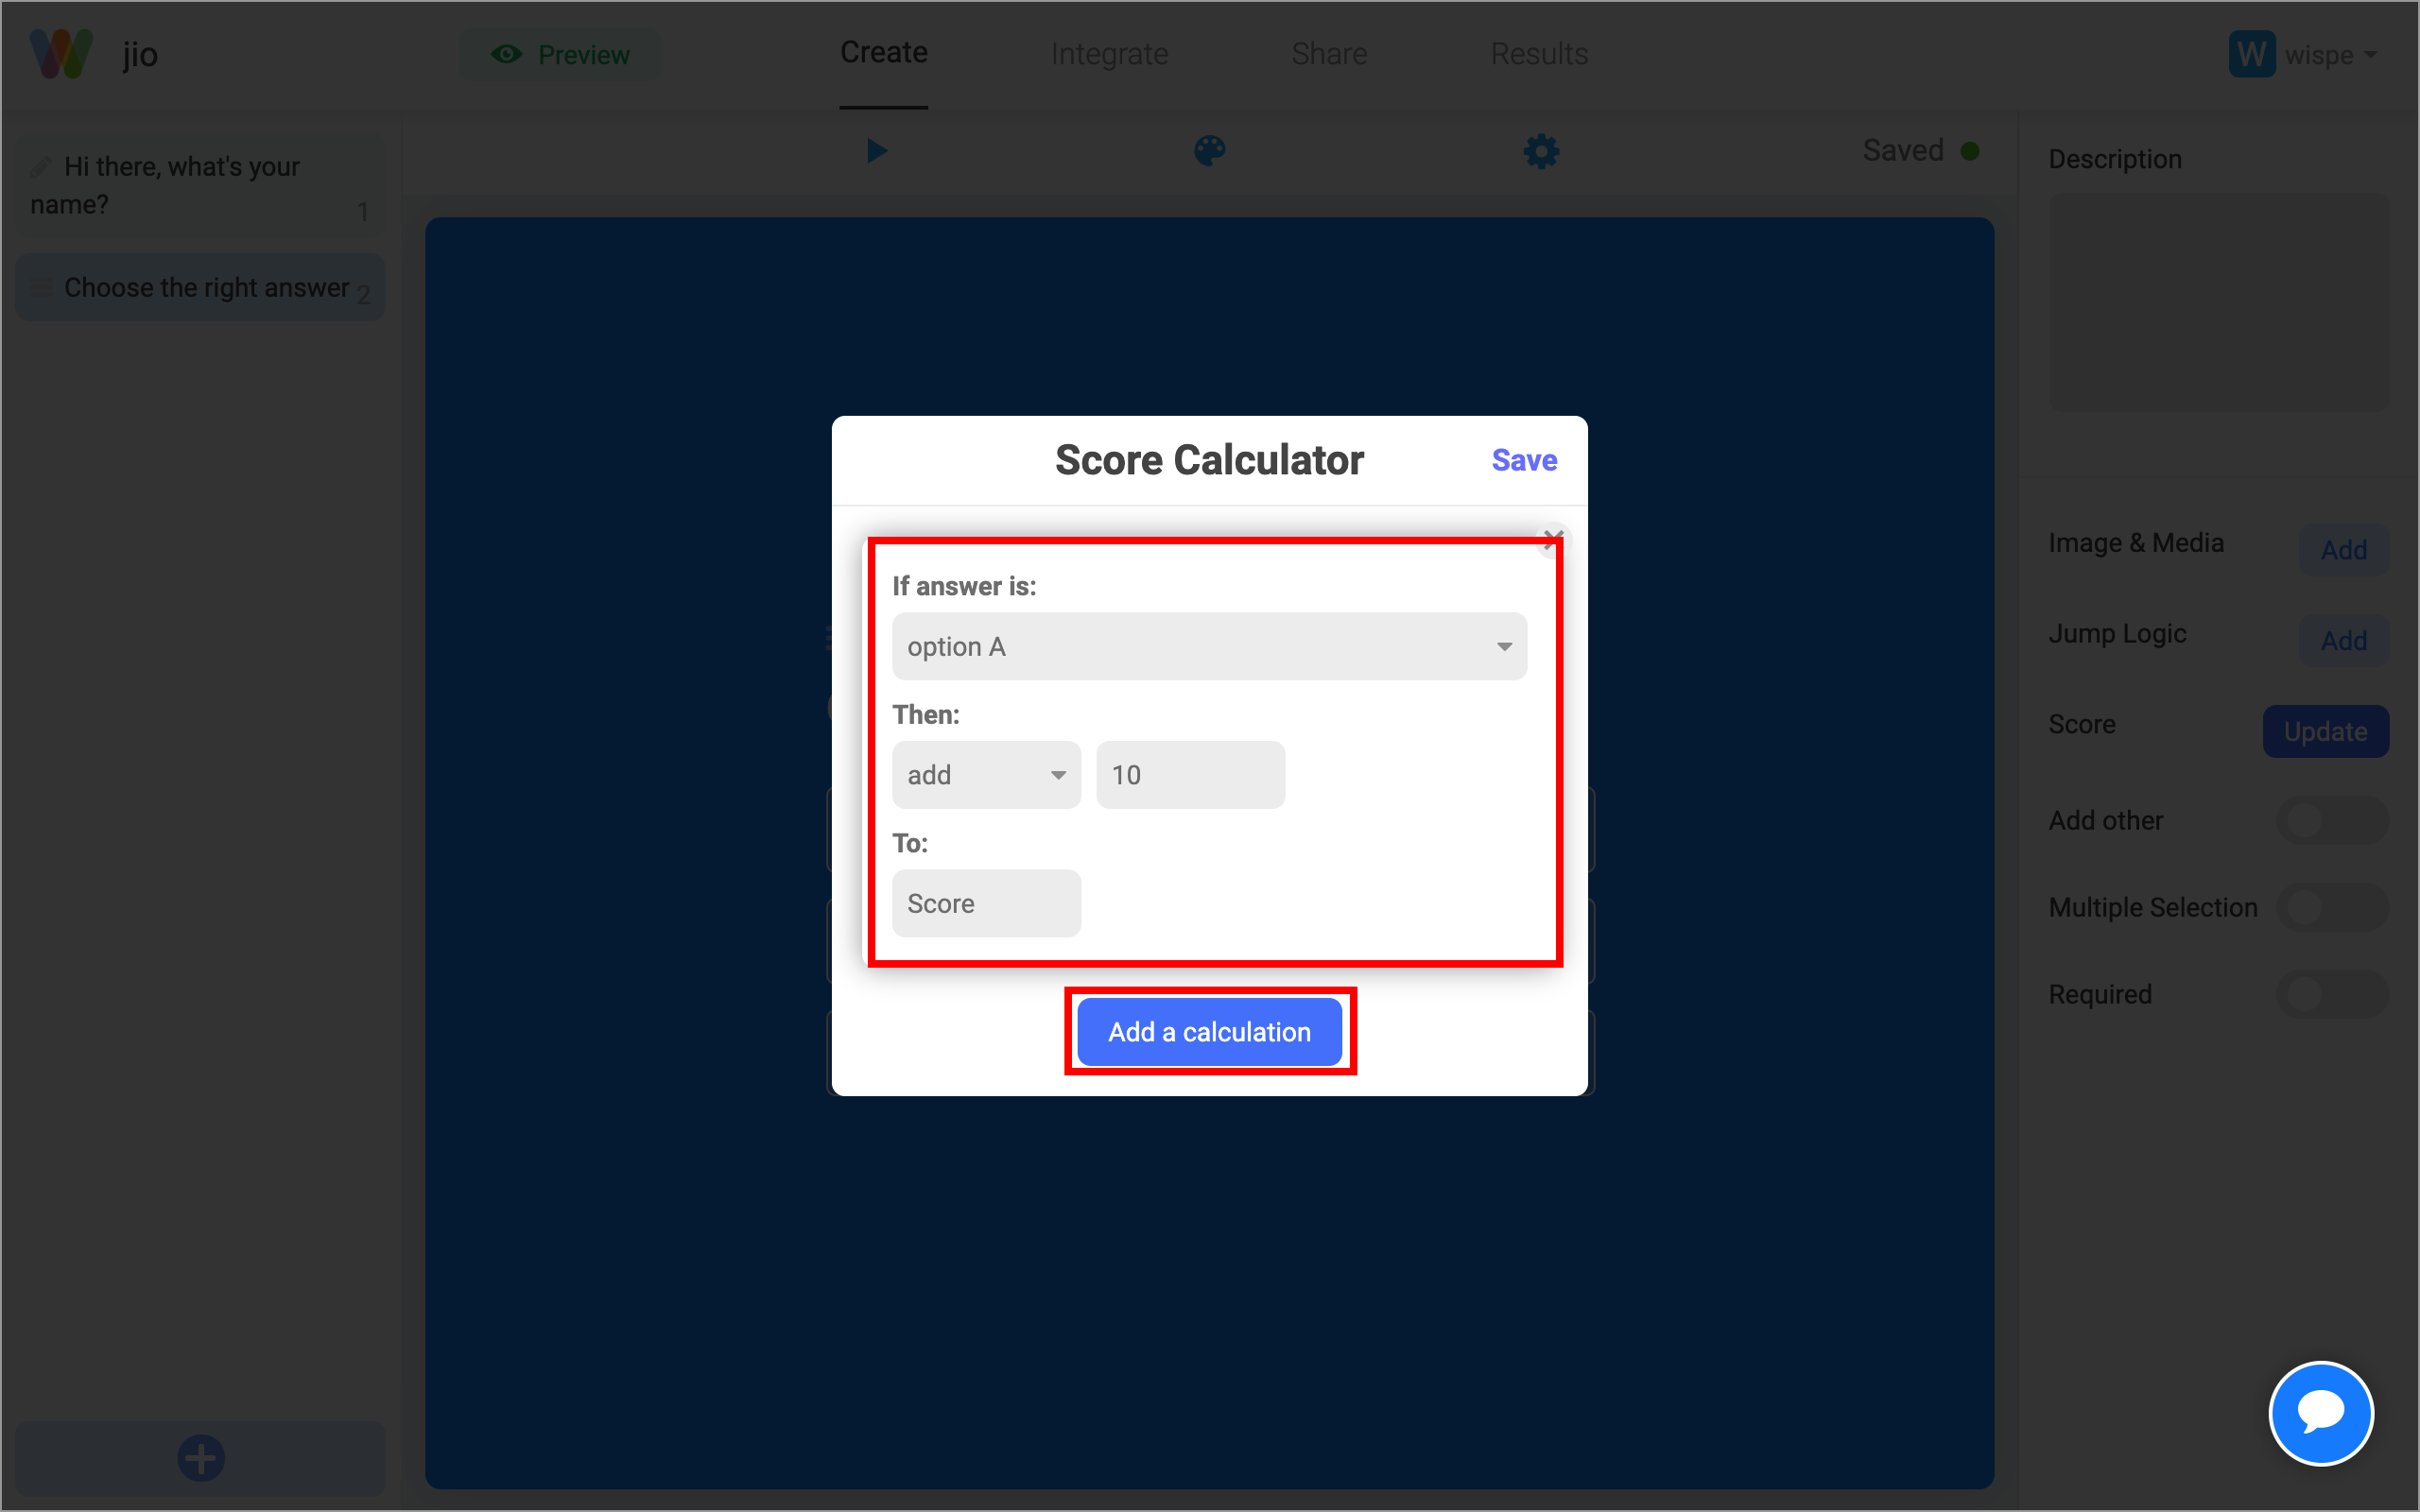
Step 3: You can set your first calculation by utilizing the dropdown and input field. In this example, we are adding 10 to score if the user selected option A. You can then click add a calculation to add more calculations.
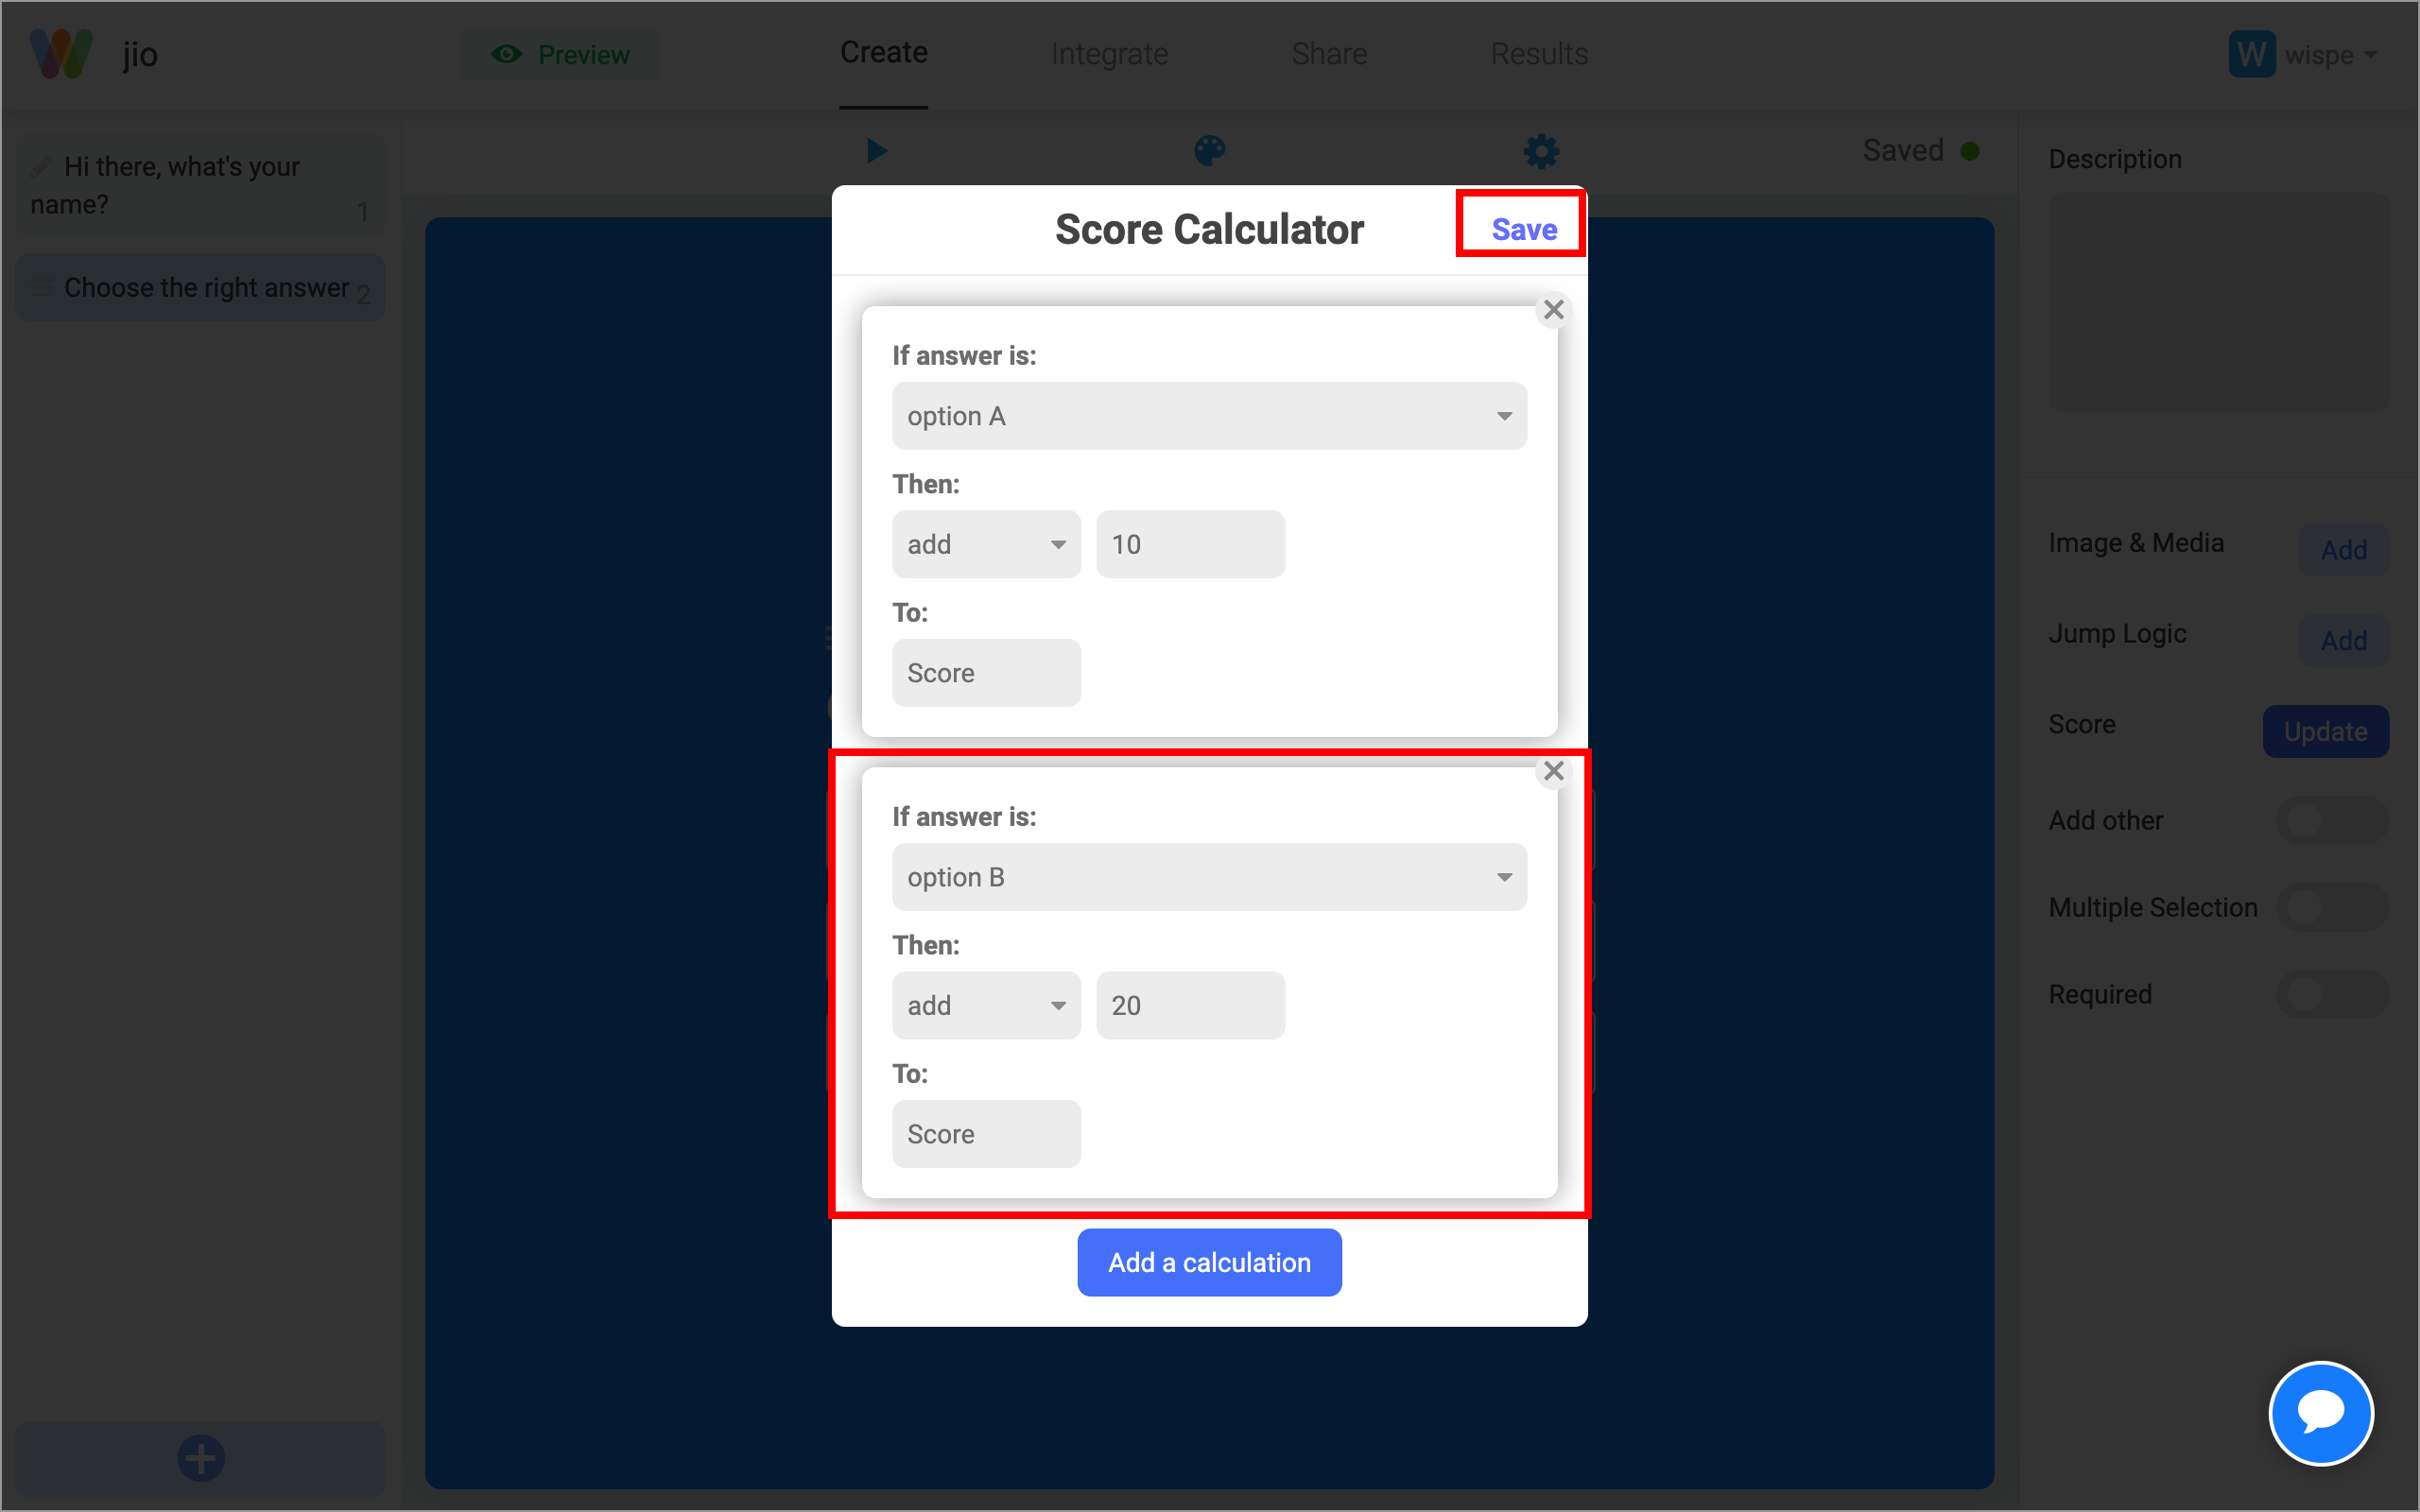
Step 4: In this second calculation, we are adding 20 to the user's score after they choose option B. Once you complete adding your calculations, hit Save to exit out of this screen. Score is now configured for this quiz.
Important Note: all calculations are added to a single score variable. You are also limited to basic, numeric, operations. If you have more complex calculation requirements, you will need to create a calculator content type on Wispform where you can define one or more variables, and for each variable, you can have complete mathematical expressions based on your user's input.
Part 2: Show specific thank you page (outcome page) based on the user's score
Step 1: After setting up the score for multiple choice questions, it is time to create thank you pages. Use the "+" button on the bottom left to add a thank you page. You can fill in the content and update the button text and redirect link.

Step 2: Below is a second outcome page you can setup for those who have failed the quiz (as an example). User will only get one of these outcome pages based on their score. Click the display logic on the right hand side to setup the logic to determine which page to show
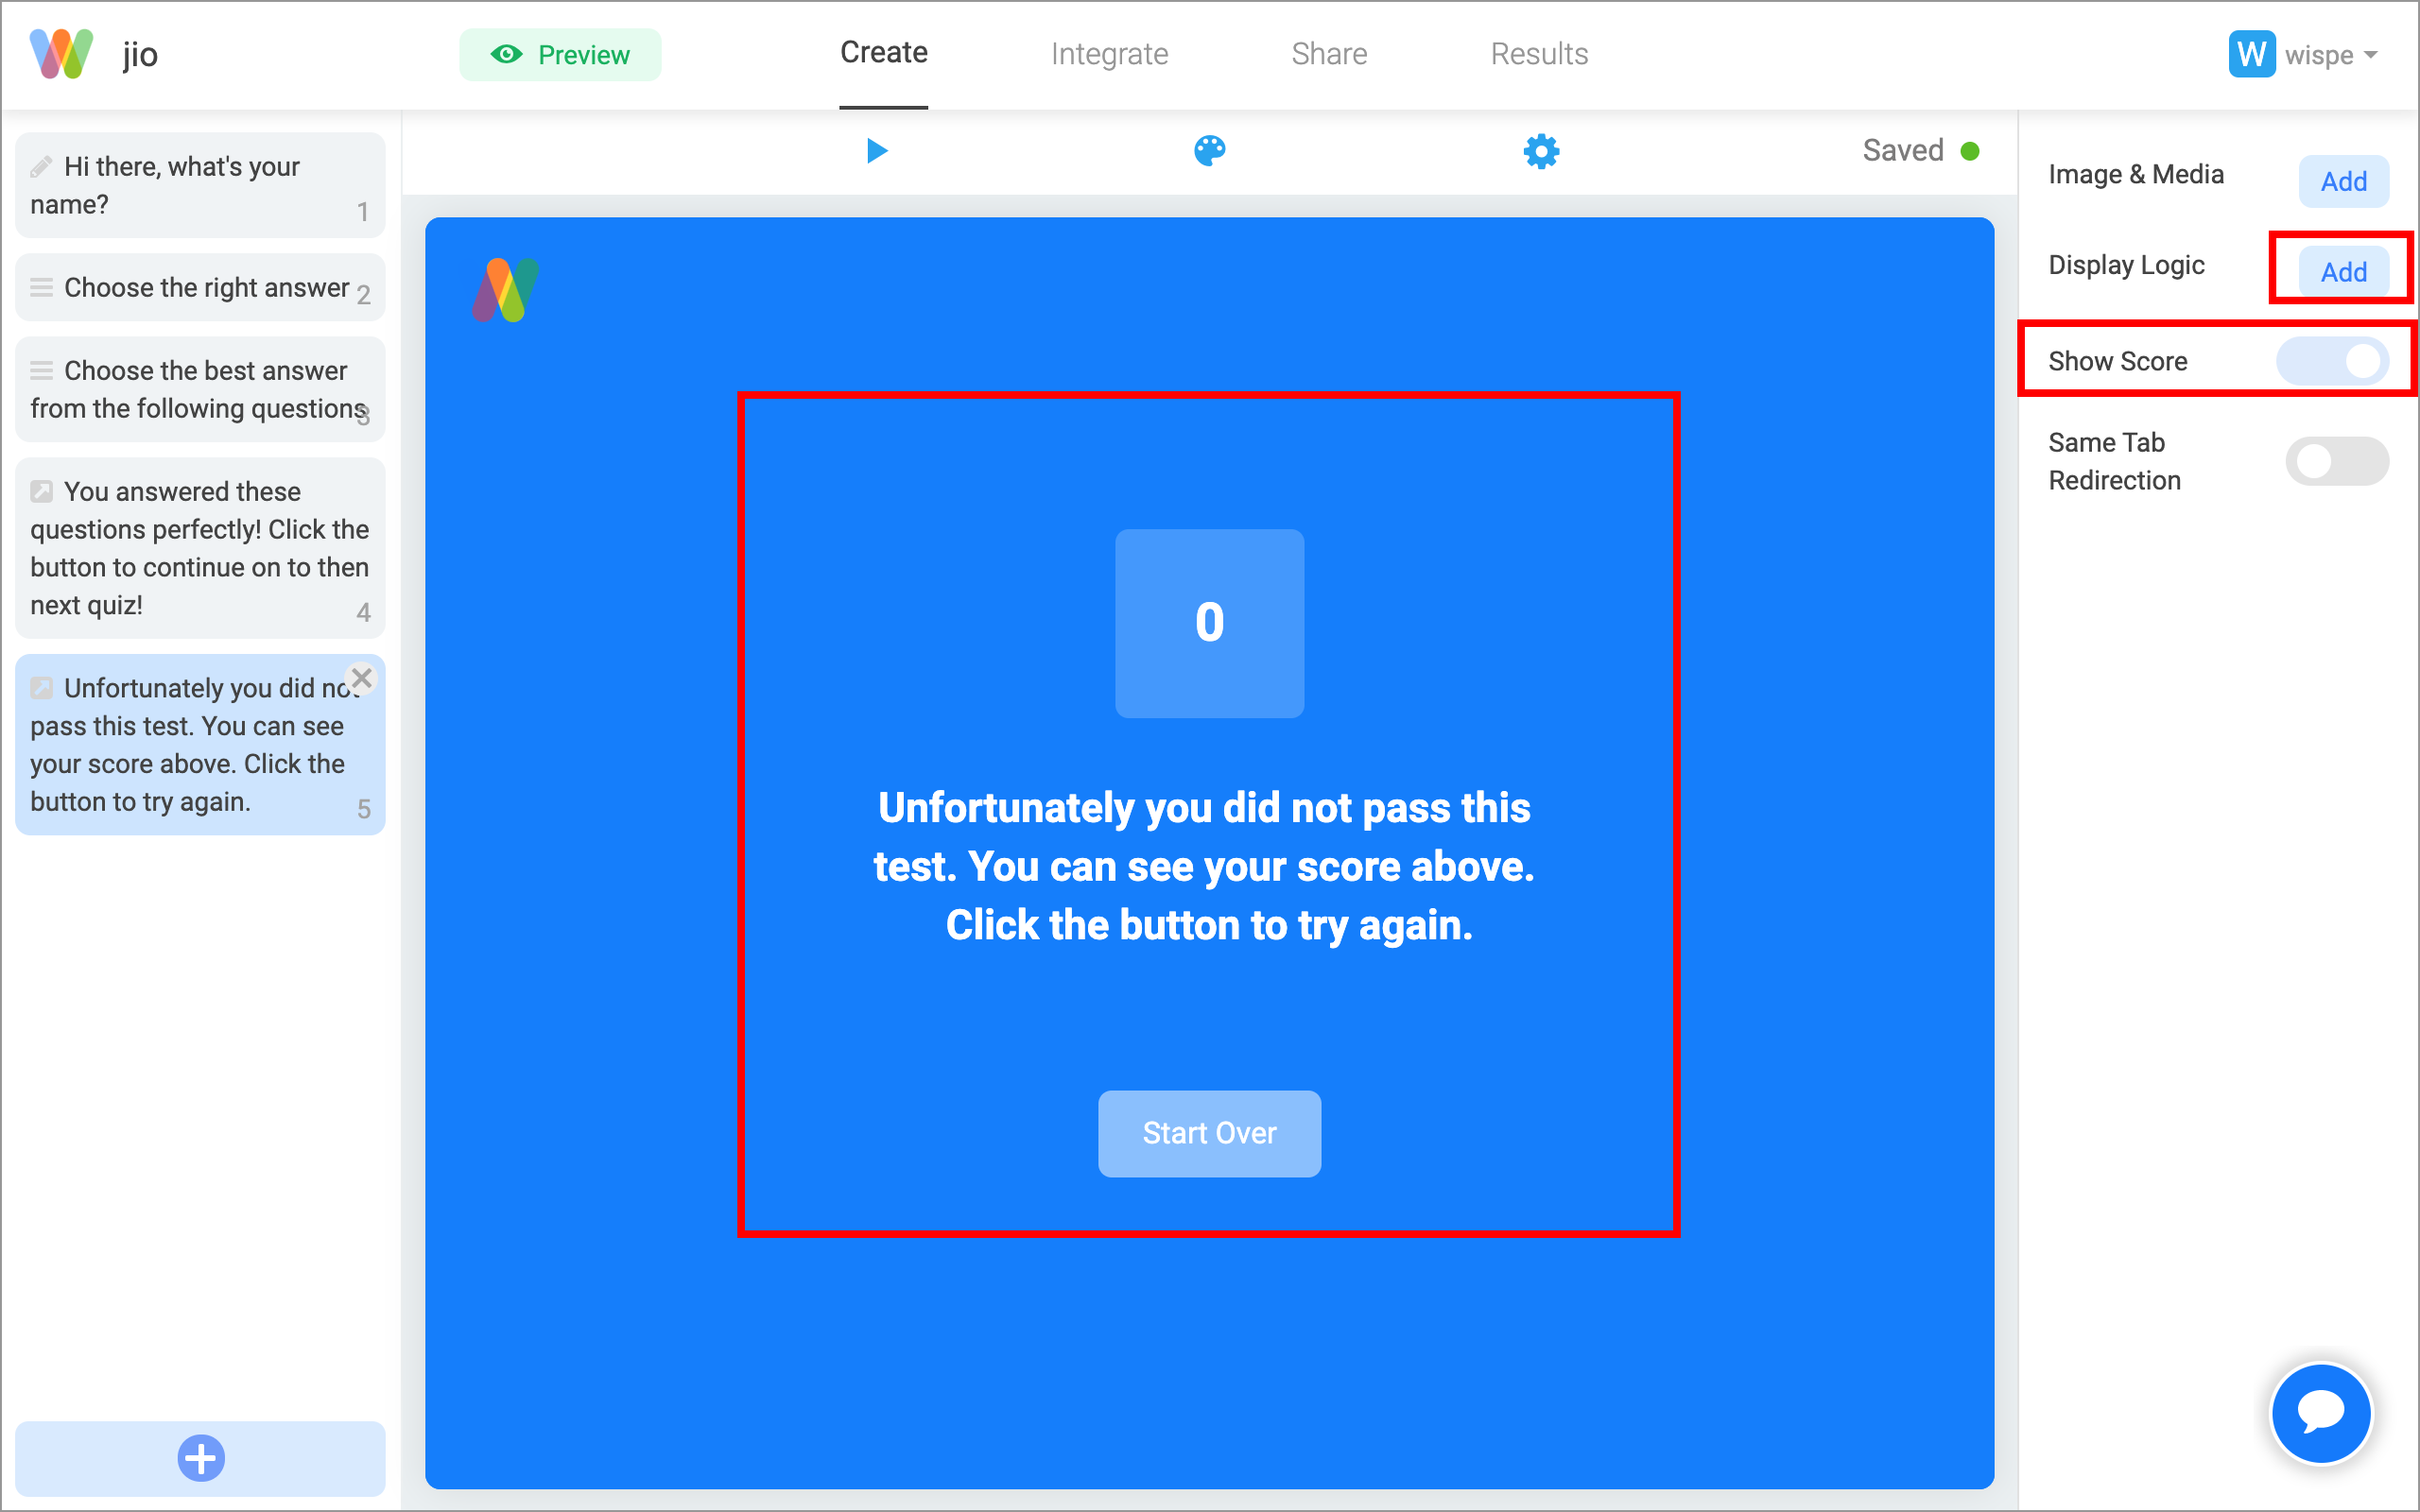
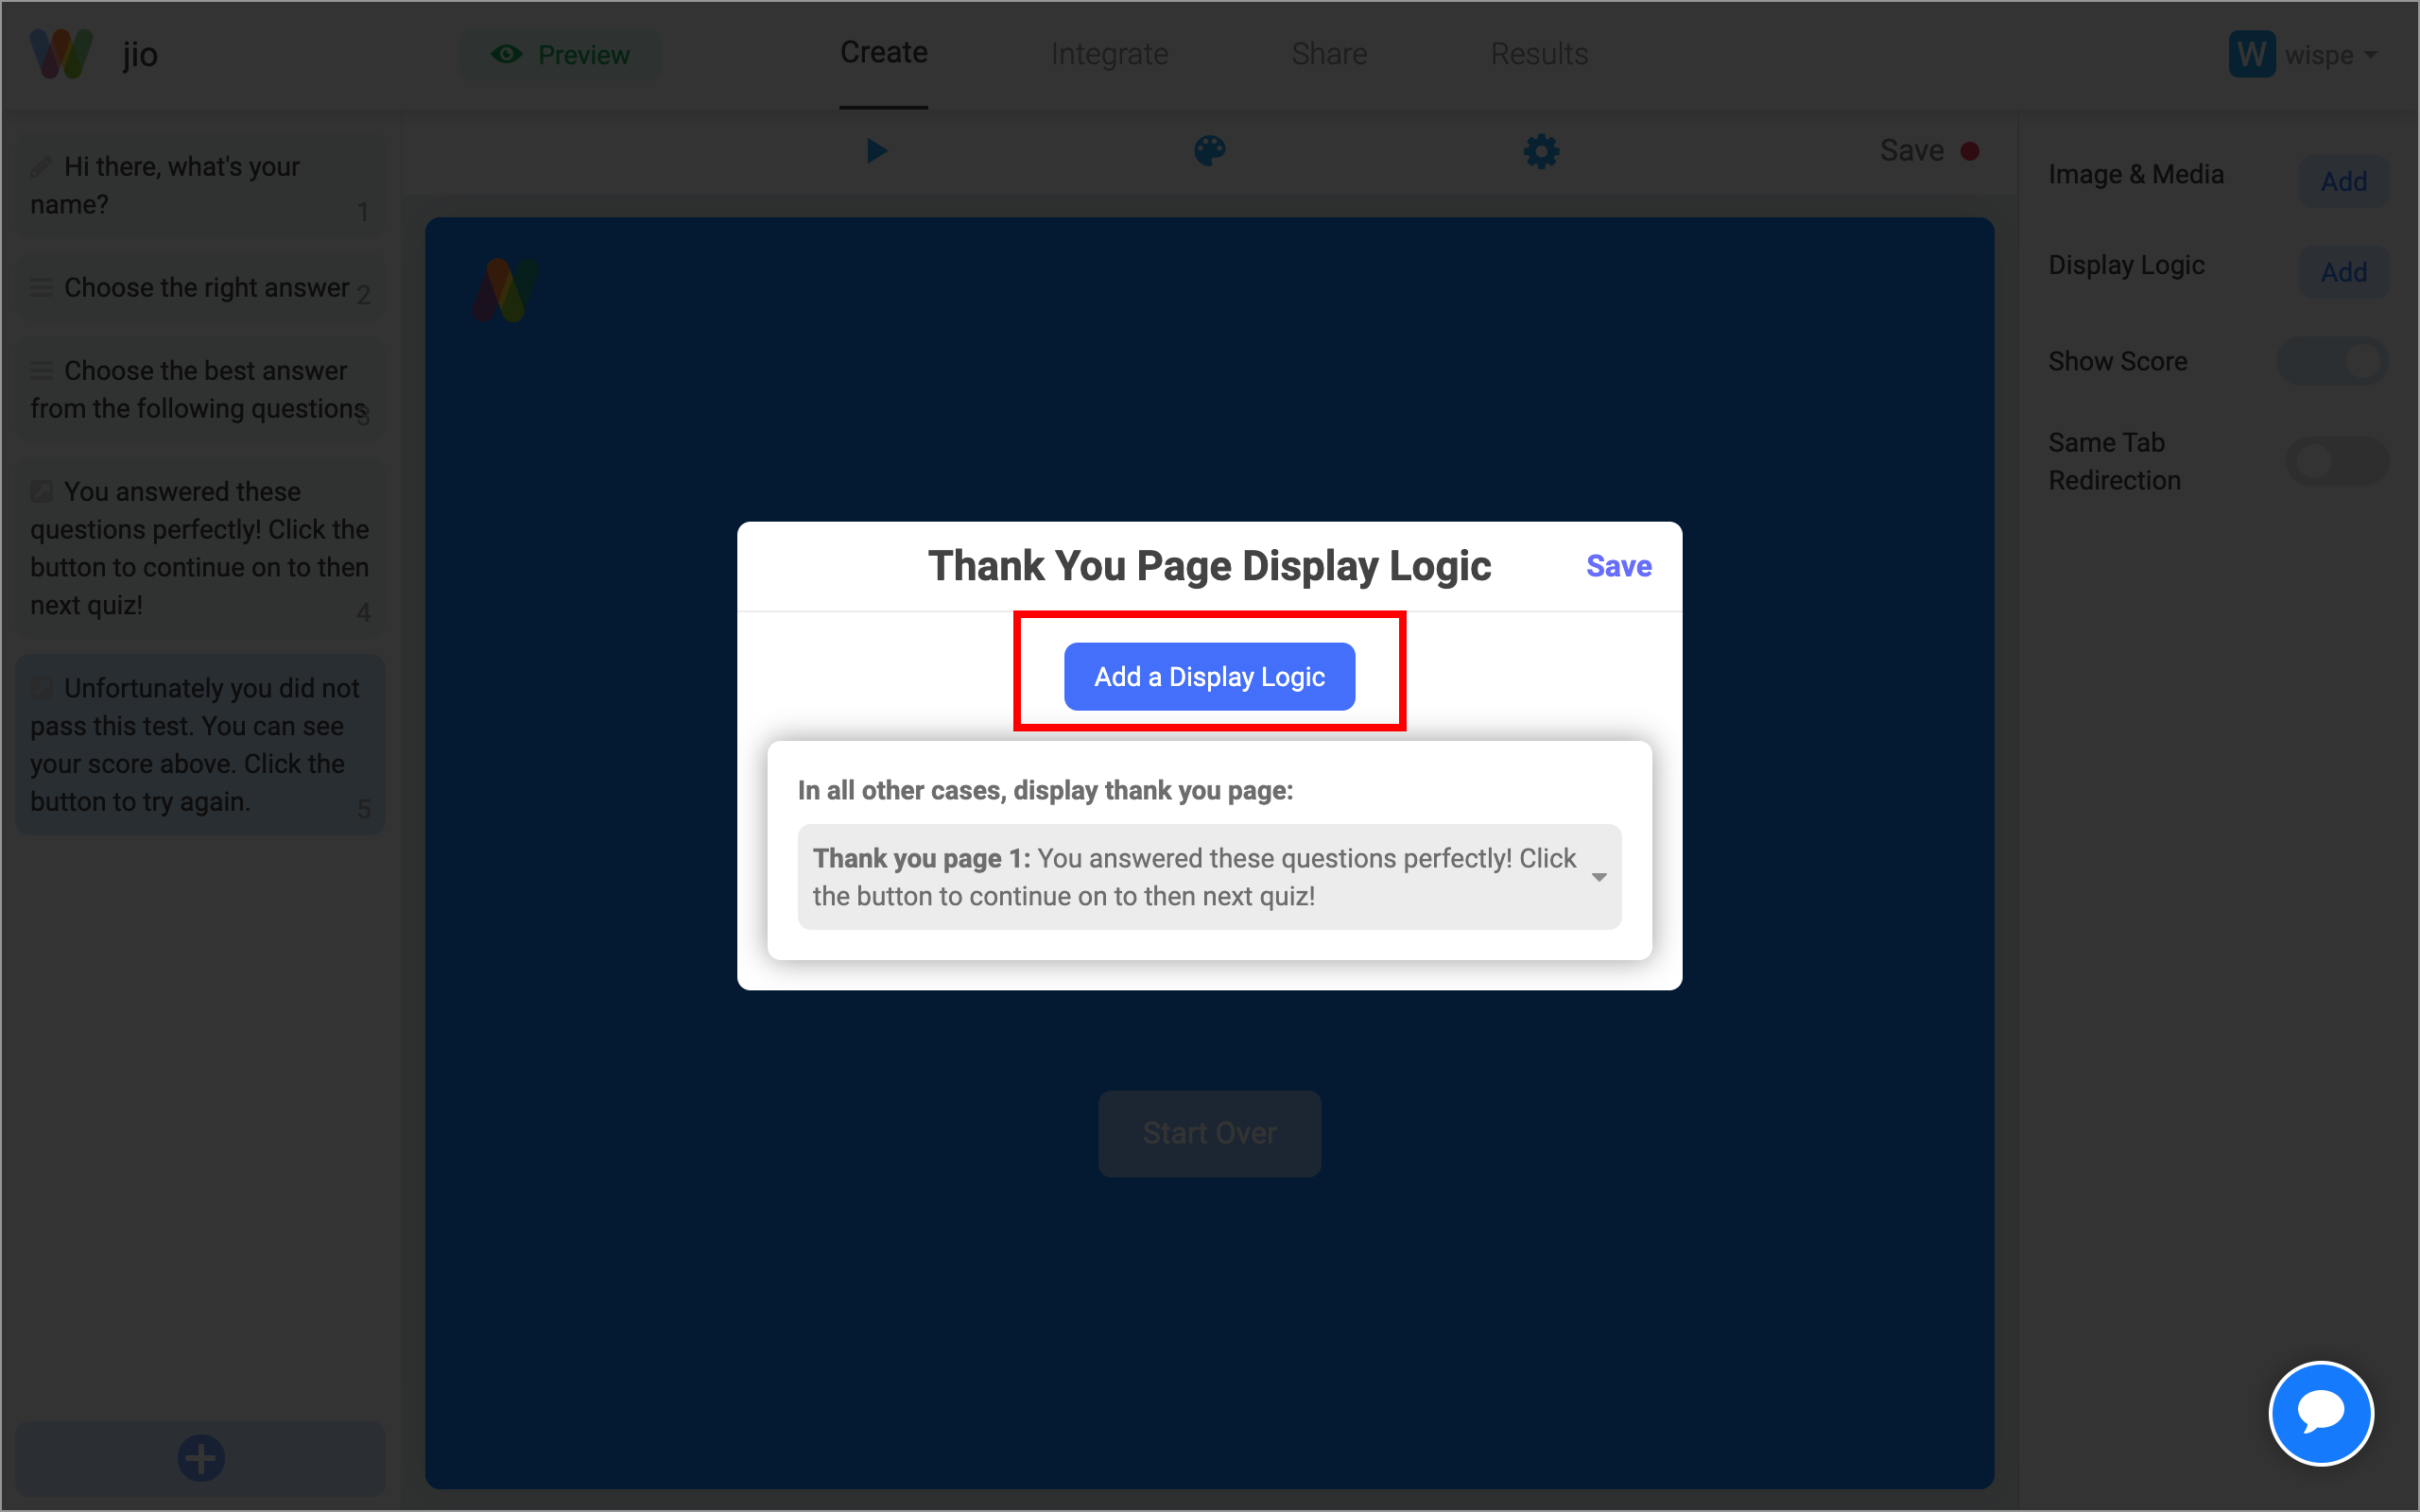
Step 3: By default, we will always show the first thank you page. However you can click "Add a Display Logic" to configure which one to show based on score.
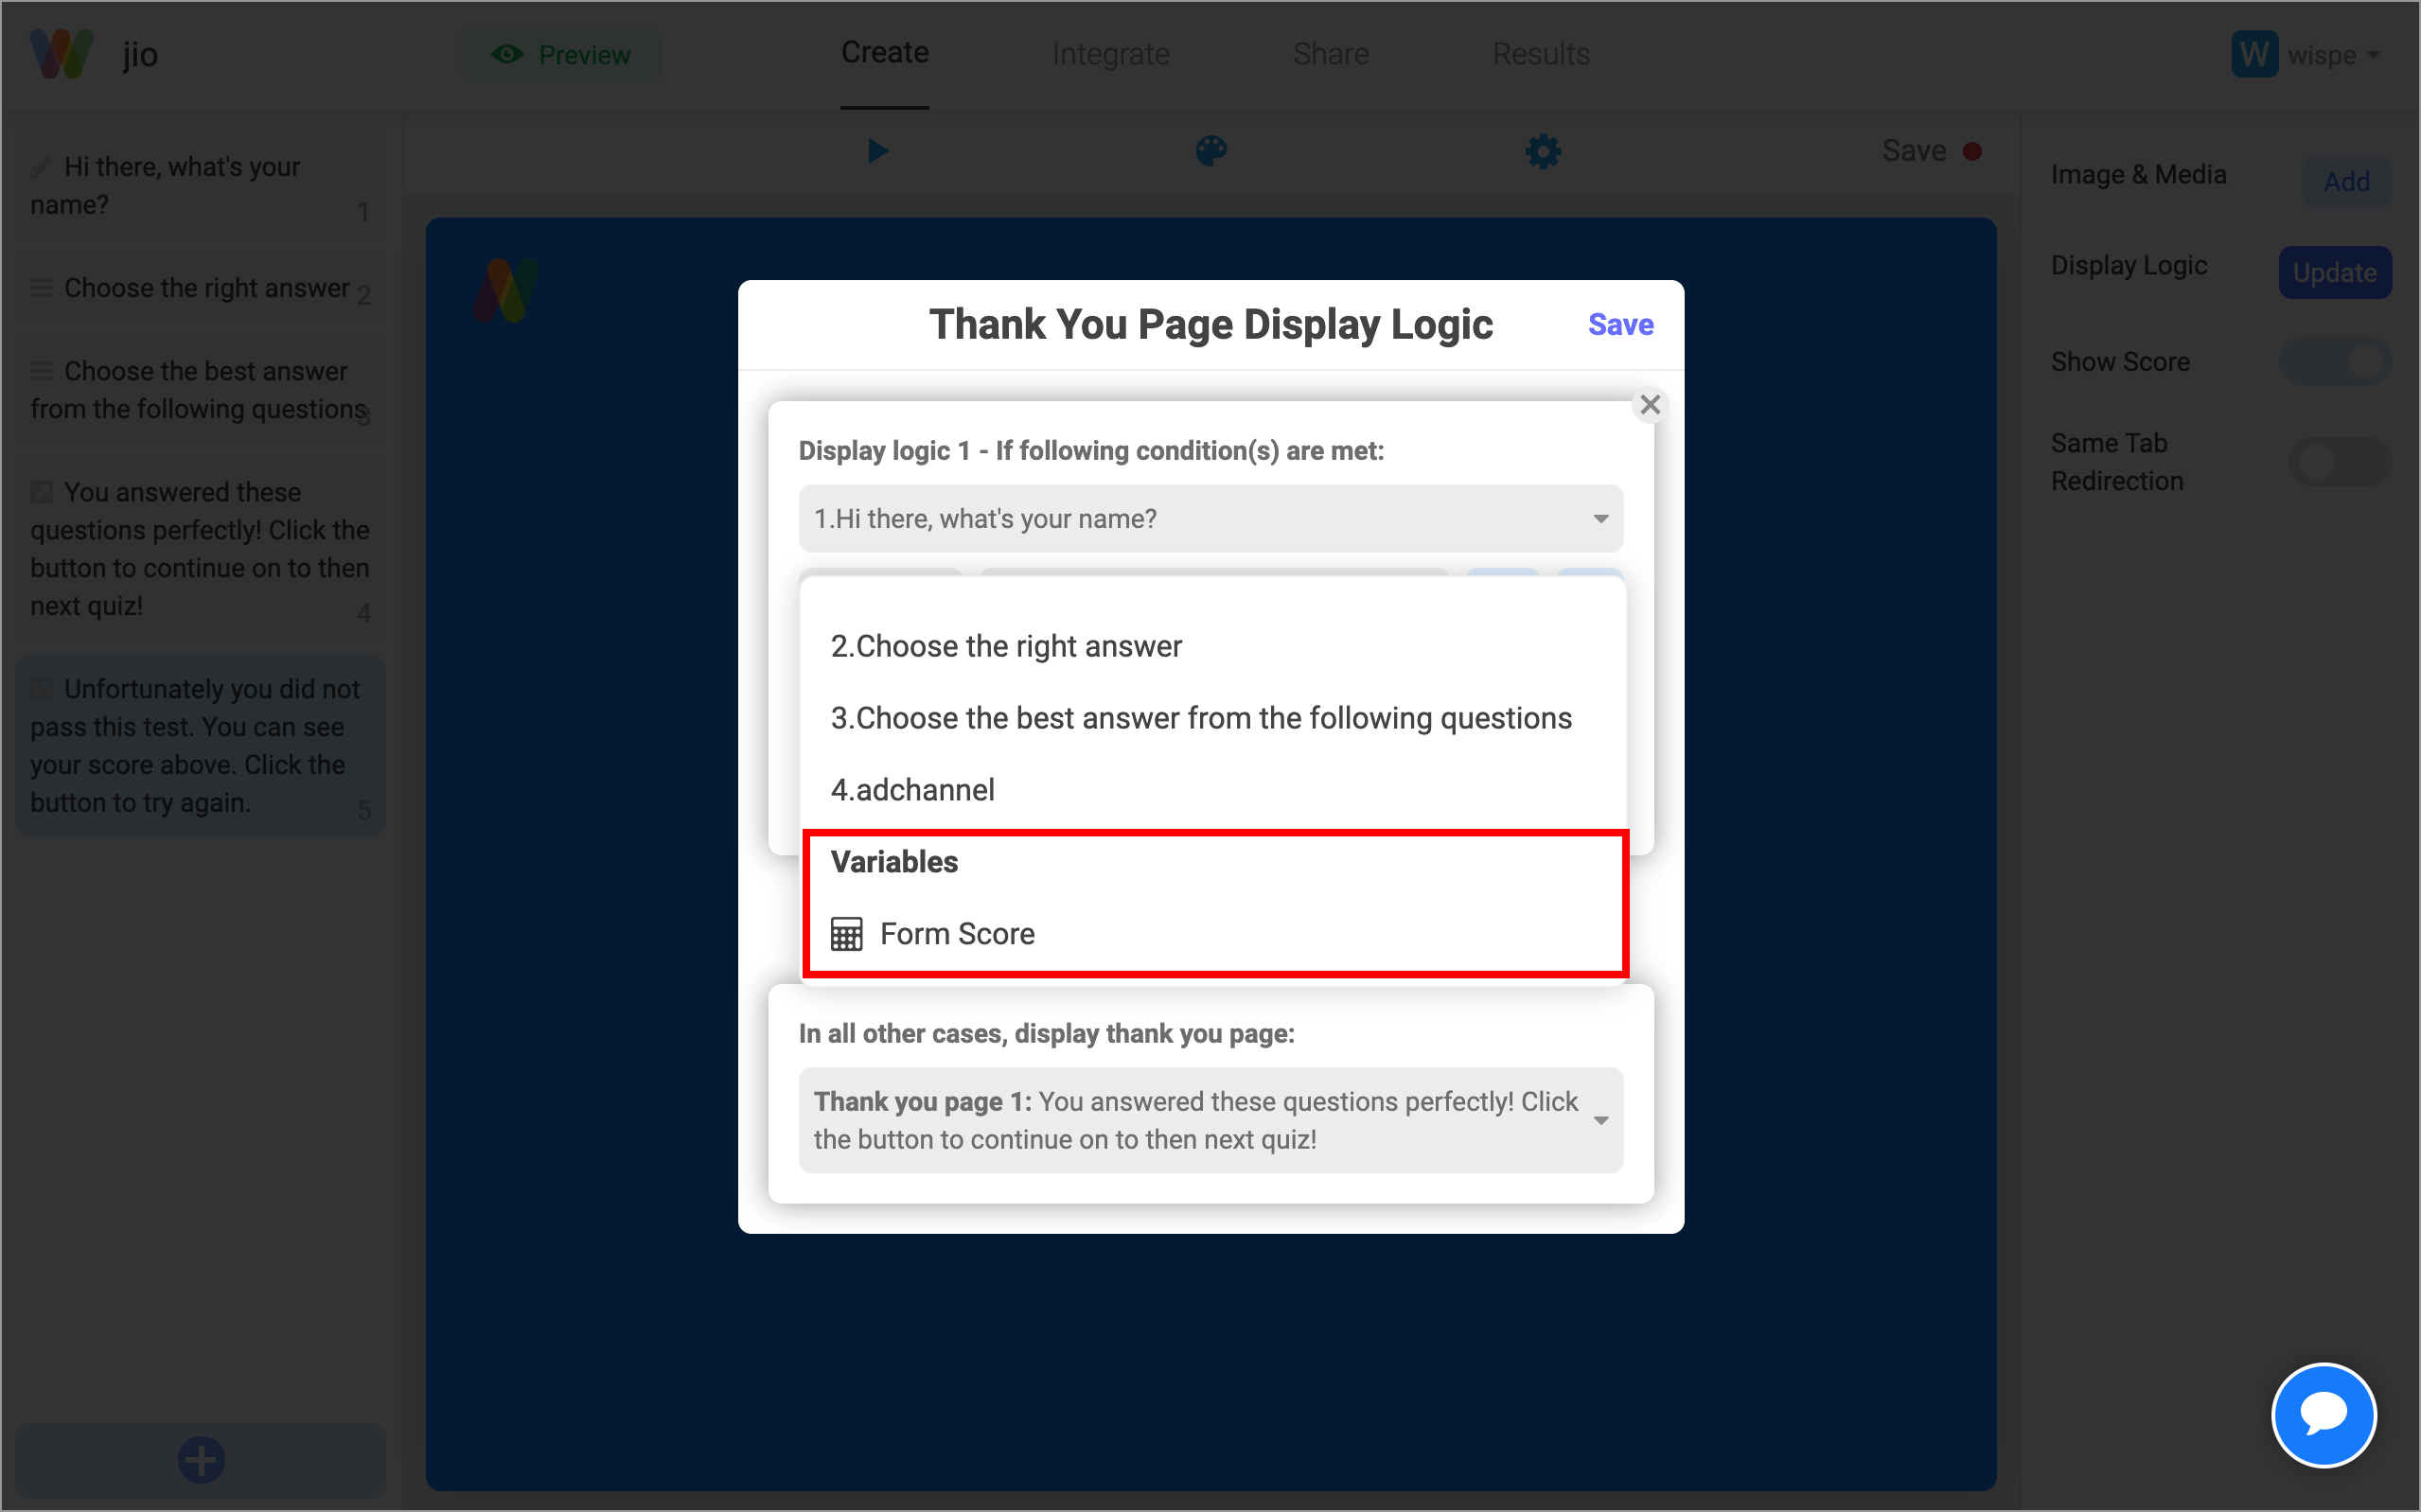
Step 4: In your first display logic, you can choose "Form score" as the condition we are evaluating based on. You can also evaluate which thank you page to show based on answers to 1 or more questions. However, this tutorial focuses on using the score variable.
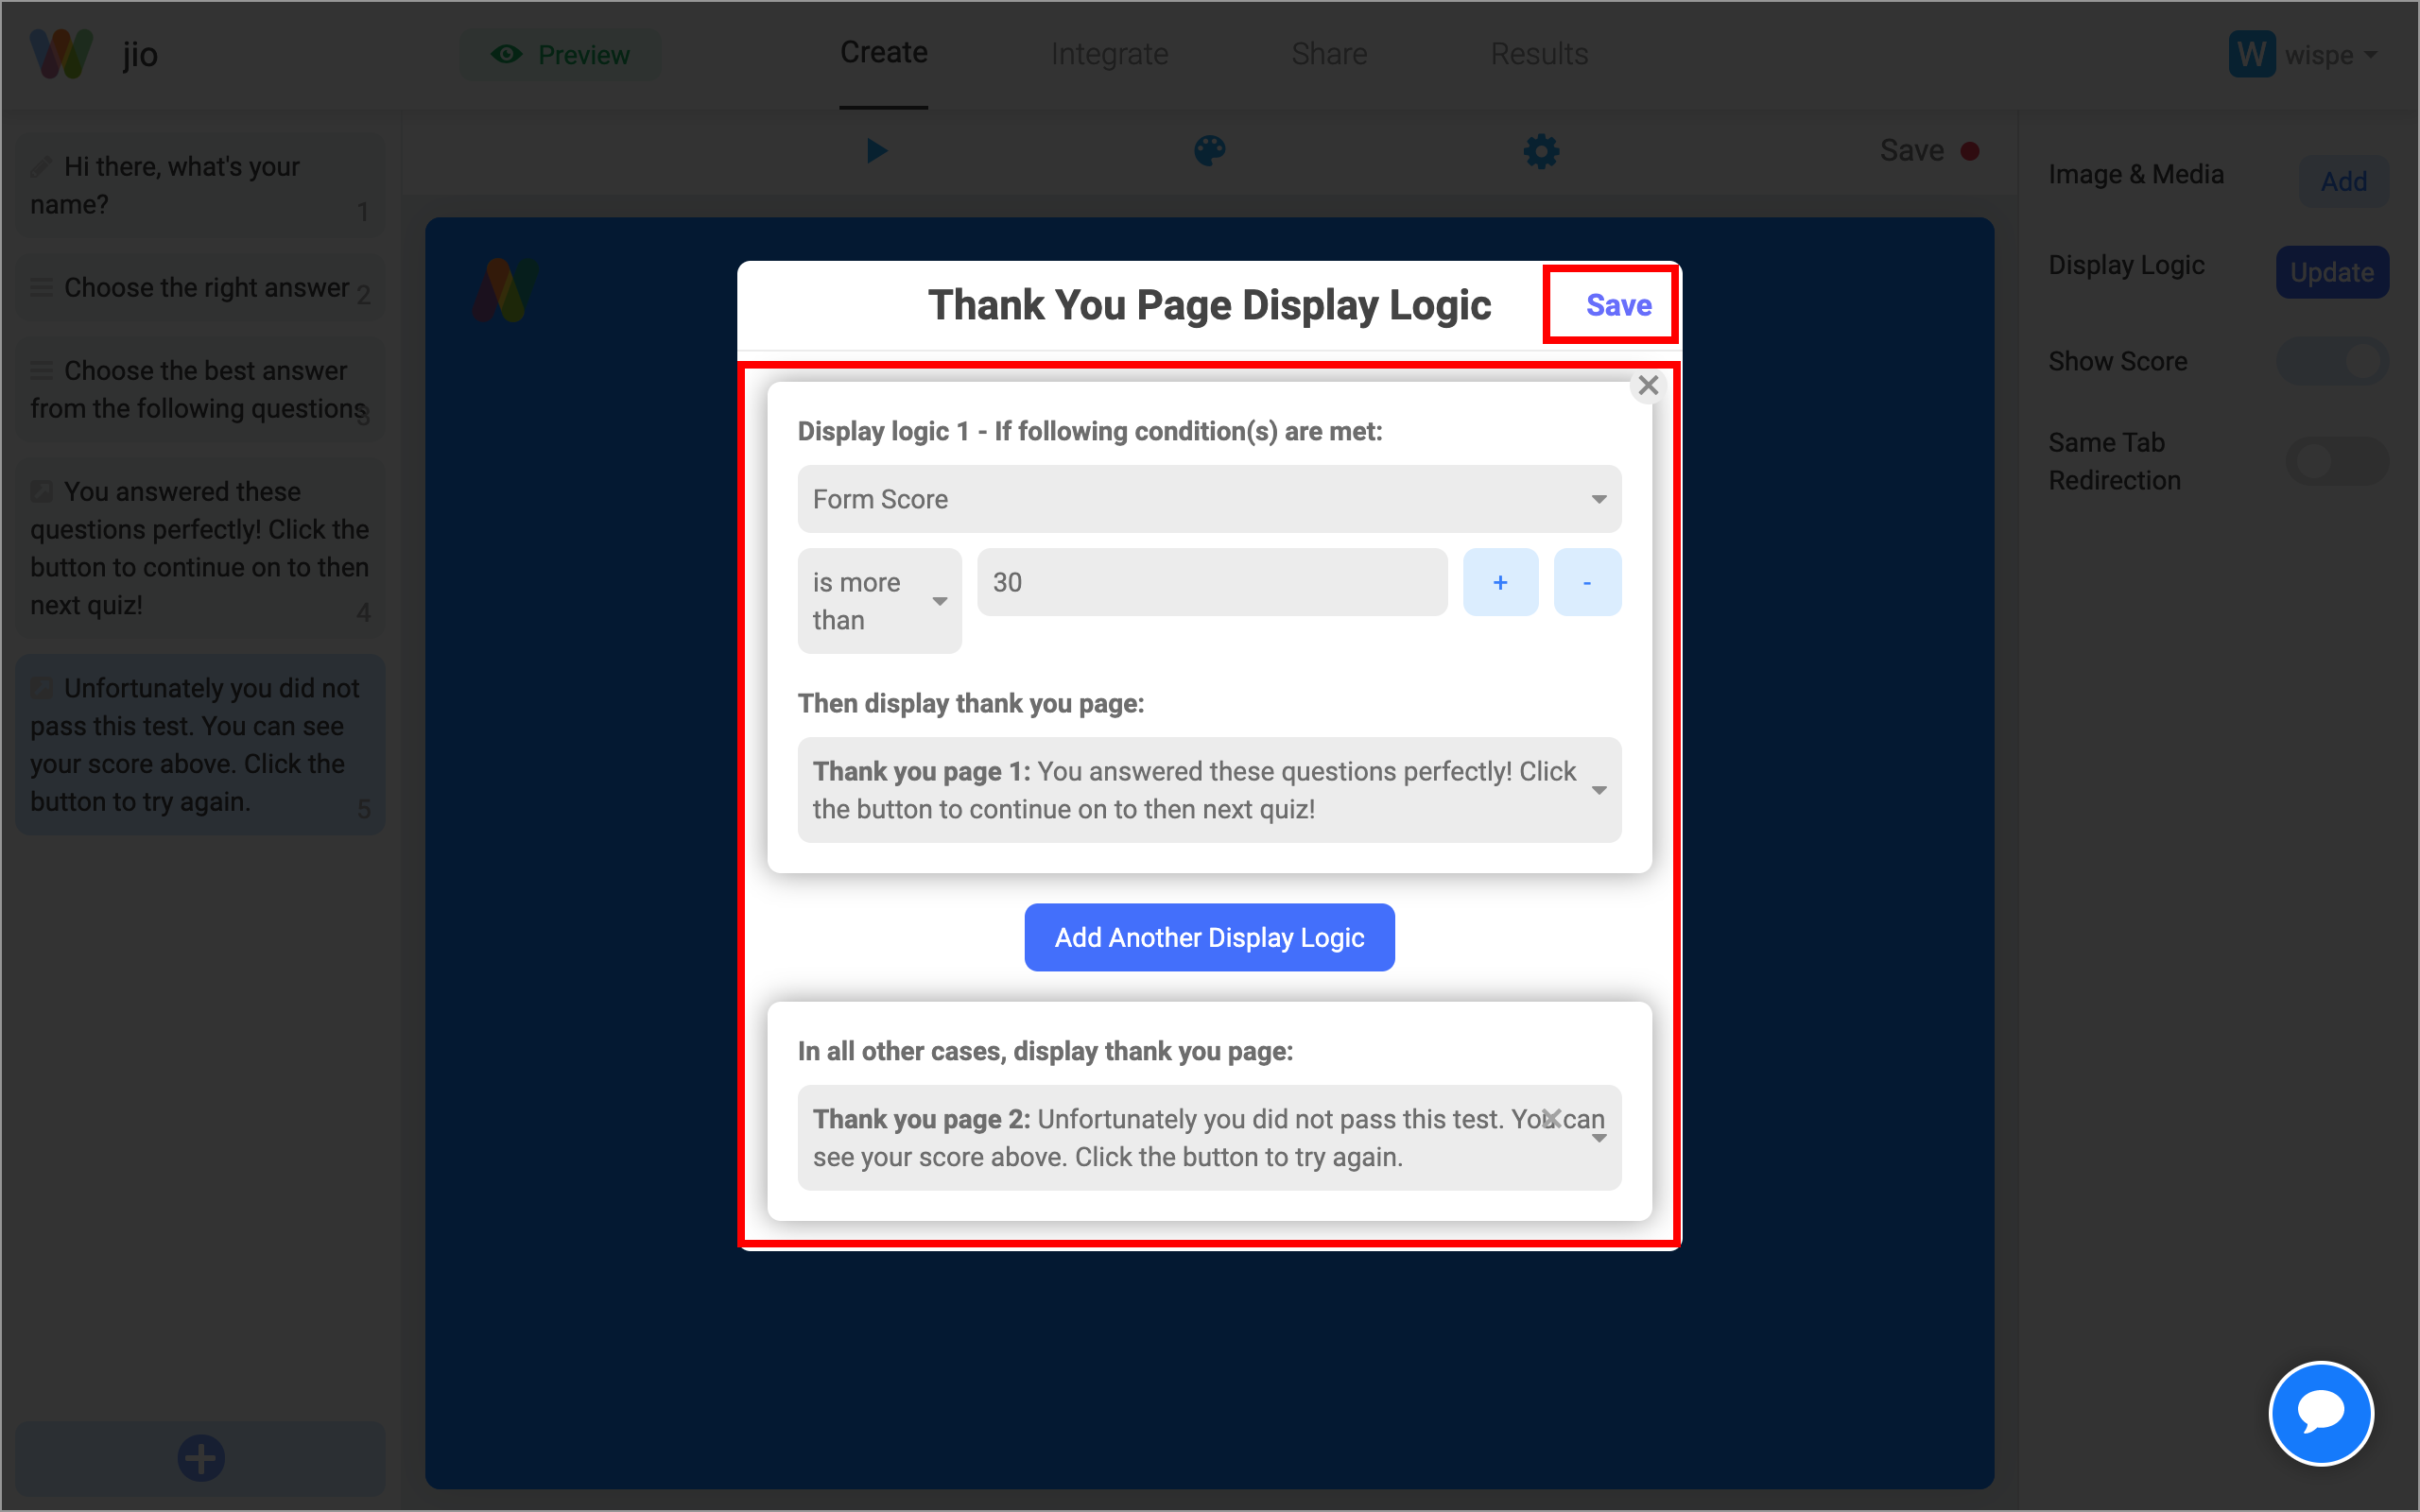
Step 5: In this example, we set if score is more than 30, we show the first thank you page where user is told that they answered the questions perfectly. For all other cases, we show the thank you page where user is told that they did not pass the quiz and need to try again. Once you complete this step, hit Save and the configuration should be live.
Part 3: Show the score that the user received on the Thank You page
You can also use the toggle on the right hand side to show the score that the user received. By default in the form builder, the score is shown to be 0. However, the number will change in the actual form based on the score that the user received.
